A food forest is designed on paper before a single tree goes in: you read the site, decide what each layer will do, and space every plant for the size it will reach in ten years, not the size it has in a nursery pot. Get that plan right and the garden feeds you with less watering and less work each year. Get it wrong and you spend years pruning shade you planted yourself. At Sacred Garden Designs we have designed water-wise, edible landscapes for over 25 years, and a Full Landscape Design, which includes this kind of planting plan, is $2,500, or $1,500 for yards under 5,000 sq. ft.
TL;DR
- A food forest is a multi-layered system of edible and supporting plants that mimics a woodland, unlike a vegetable bed, which is mostly one low layer of annuals.
- Design starts with the site: light, wind, water movement, soil and your USDA hardiness zone.
- Plan seven layers by height, and space plants for mature size so light reaches the lower layers.
- Plant trees first, mulch heavily, and give the system water until each layer is established.
- Expect a few years before it is largely self-maintaining, and plan the layout so you can walk through it.
Table of Contents
- What a food forest is, and how it differs from a garden
- Read the site before you draw anything
- The seven layers, and what each one does
- Lay it out for light, access and mature size
- Choose plants for your zone, climate and water
- Prepare, plant and water in the right order
- Add stormwater features to the design
- Perspective
- Let us design yours
- FAQ
- Sources
What a food forest is, and how it differs from a garden
A food forest is a multi-layered edible plant system that copies how a forest works. According to UF/IFAS Extension, it combines food-producing canopy trees with shrubs, herbaceous plants and ground covers that tolerate understory conditions, and it can also be designed for biodiversity, soil health, rainwater infiltration and wildlife habitat. A vegetable garden, by comparison, usually concentrates on annual crops in a single layer one to three feet tall.
It also differs from an orchard. A landscape architect at Mississippi State University Extension describes a food forest as a polyculture that mimics natural woodland: it packs in crop diversity in less space, slows the spread of pests and disease, and turns fallen leaves and branches into living soil.
The design consequence is simple. In a bed you can fix a mistake next season. In a food forest, the trees are the structure, and everything else is arranged around them. That is why the plan matters more than the planting.
Read the site before you draw anything
Every good layout begins with observation. The University of Florida’s Gardening Solutions guide tells you to evaluate how much light the property gets, the strength and direction of prevailing wind, and how water moves across the land, including drainage and wet spots. It also calls for a soil test to learn pH and soil profile, and for using the USDA Plant Hardiness Zone map to decide which plants belong in your area.
Here is what to walk through on your own property:
- Sun. Note which areas get full sun, partial shade and deep shade at different times of day. Existing trees and neighboring buildings count.
- Wind. Find where wind is strongest and which side it comes from. A windbreak shrub or tree belongs there.
- Water. Watch where water runs and pools after rain. NCAT’s forest garden planning guide advises mapping seasonal precipitation and water movement, then using earthworks such as swales, berms, terraces and ponds to slow and capture water and cut irrigation needs.
- Soil. Test it before choosing species rather than guessing.
- Zone. Look up your location on the USDA Plant Hardiness Zone Map so you only shortlist plants that survive your winter lows.
Roof and downspout runoff is part of the water picture. If a corner of the yard floods every storm, a few simple yard tests for roof runoff show you where the water comes from before you plant anything there.
Check the rules and what is underground
The USDA Forest Service and NCAT urban agroforestry tipsheet advises urban planters to check zoning and permits, locate underground utilities before digging, and test soil for heavy-metal contamination. In the US, you reach the free utility-marking service by dialing 811, which state services such as Texas811 ask you to do two business days before you dig. This matters as soon as you plan swales, trenches or irrigation lines.
Slopes and drainage
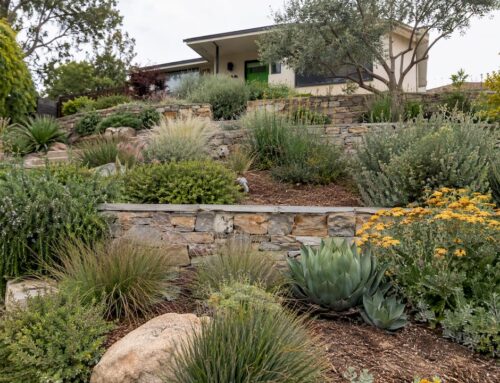
A hillside food forest can work well, because terraces and basins hold water where it would otherwise rush off. It also raises the stakes: steep ground needs retaining walls, stable soil and a drainage plan. Our team handles slope stabilization, hardscape construction such as retaining walls, and irrigation design and installation, so the structure of the site is settled before the plants go in. For hillside work in Los Angeles, see our guide to hillside landscaping on slopes over 30%.
The seven layers, and what each one does
The “seven layers” is the framework most designers use. The sources differ slightly in naming, but the idea is the same: use height and root depth so plants share one footprint without competing for the same light. NCAT notes that forest gardens can have up to eight layers, each occupying its own light or shade niche.
UF/IFAS sorts layers by height: canopy trees 20 feet and taller, lower trees 10 to 20 feet, a shrub layer of 3 to 10 feet, plus ground and root layers. It also notes that not every plant needs to be edible: some supply biomass, fix nitrogen, block wind, deter pests or attract beneficial insects.
| Layer | Role | Examples from extension sources |
|---|---|---|
| Canopy | Tallest structure, shade, large harvests | Oak, pecan, pawpaw, persimmon, walnut |
| Dwarf fruit trees | Mid-height fruit | Dwarf apples |
| Shrubs | Berries, windbreak | Blueberry, raspberry, currants, chokeberry, viburnum |
| Herbaceous | Perennial vegetables and herbs | Rhubarb, sorrel, comfrey, thyme |
| Root | Underground and stem crops | Carrot, parsnip, sunchoke, sweet potato |
| Ground cover | Living mulch, soil protection | Canadian ginger |
| Climbers | Use vertical space | Cucumbers, beans, squash, nasturtium |
The examples above come from the State Foresters’ guide to creating a forest garden, which notes that climbers can be trained on trees, trellises or fences. Those species suit cooler, eastern climates. In Southern California or another warm, dry region, the same layers are filled with different plants, which we cover below.
Lay it out for light, access and mature size
This is where most backyard food forests succeed or fail. Three rules do most of the work.
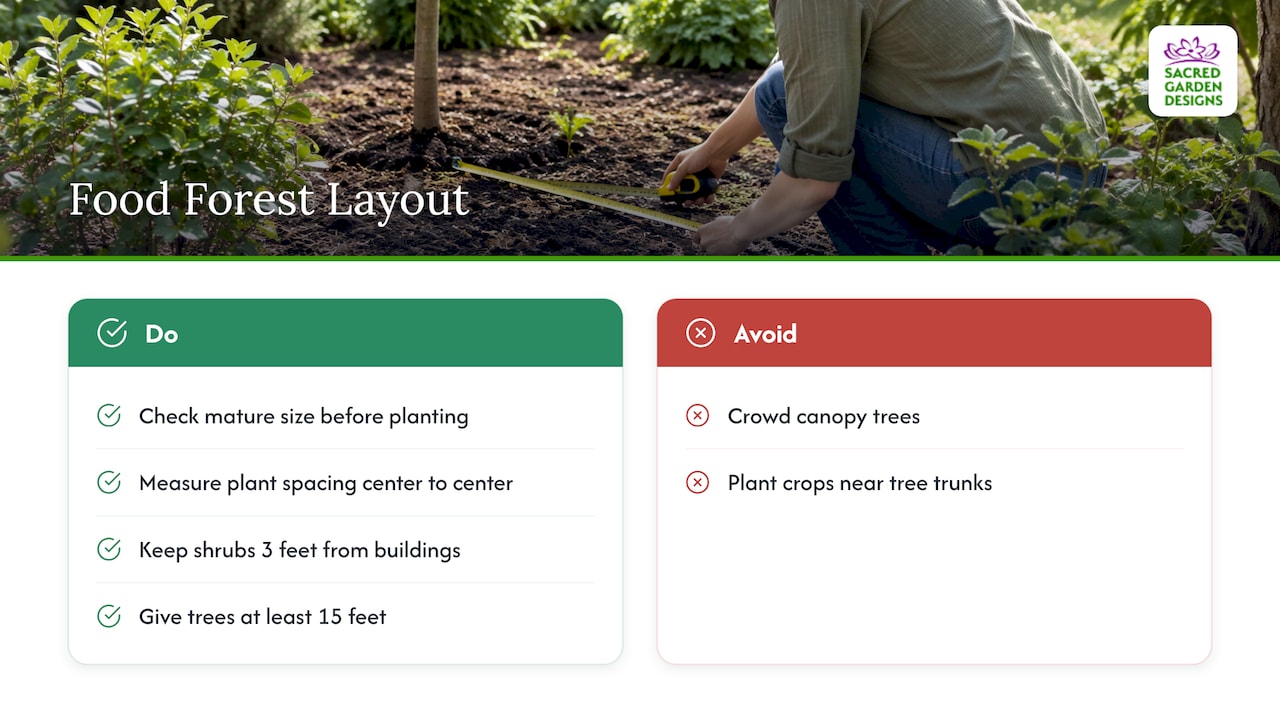
1. Design for the plant at ten years. UF/IFAS Florida-Friendly guidance says to know each plant’s mature size before planting, because good spacing gives better airflow and sunlight, fewer pests and diseases, and better production. Measure spacing from the center of one plant to the center of the next. Keep shrubs about 3 feet from buildings, and give trees at least 15 feet.
2. Let the light through. NCAT’s Katherine Favor explains that in the early-successional forests these gardens imitate, overstory and understory trees are spaced widely enough for light to reach the lower layers. If you pack canopy trees tightly, the shrubs and herbs beneath them will starve for sun.
3. Keep roots out of each other’s way. The USDA tipsheet says understory vines, annuals and root crops should be planted several feet from tree trunks to avoid root competition, while sprawling, shallow-rooted ground covers can sit closer to other plants.
Two more details are easy to overlook. First, put the less cold-hardy plants on the south or southwest side, near pavement or large trees, where it is warmer. Second, draw paths into the plan. You will be harvesting, pruning and mulching for decades, and a food forest you cannot walk through becomes one you stop tending.
And consider the long game. As UF/IFAS Extension’s Beth Marlowe notes, perennials make a good-looking composition a longer-term goal, and designers must ask whether each layer will get the sun and water it needs. A drawn plan with a mature-size circle for each plant answers those questions before they cost anything.
A small yard is enough
You do not need acres. A food forest can work in a modest yard if you pick compact varieties and use the vertical dimension. Our guide to a small backyard drought design shows how to fit planting zones, paths and water-saving features into a tight footprint.
Choose plants for your zone, climate and water
NCAT recommends choosing plants by climate, hardiness zone, land-use history and the vegetation already on site, favoring native or naturalized species or those bred for disease resilience. Because perennials stay for years, it also suggests picking species that should handle projected temperature and weather extremes. The USDA tipsheet adds a practical point for city yards: prefer species that won’t interfere with buildings or overhead wires.
Local examples show how far the palette shifts by region:
- Central Florida. UF/IFAS Polk County describes a backyard food forest built around existing mature oaks as the canopy, with pigeon pea, tropical spinach, herbs, and cowpea and sweet potato as living mulch to keep soil cooler in summer heat.
- Warm-winter zones. Florida-Friendly guidance suggests low-chill varieties such as blueberries where winters are mild. Chill hours matter in Southern California too, and we cover them in our guide to fruit trees for Los Angeles on 100 to 500 chill hours.
- Cold climates. South Dakota State University Extension’s edible landscaping guide shows the same six-layer planning approach applied to a harsher winter.
In drought-prone regions, plant choice and water supply are one decision. Pairing edible plants with low-water ones is the idea behind our guide to water-wise edible landscaping, and trees do double duty as shade: see our evidence on trees for climate modification.
Prepare, plant and water in the right order
The South Dakota State guide gives a clean sequence:
- Mark paths and planting areas.
- Sheet mulch the planting areas with cardboard or newspaper, organic matter, and wood chips or similar material.
- Set up water. Hose, drip irrigation, rainwater harvesting or another method all work, but access must be in place first.
- Plant trees first to establish the structure, then shrubs, herbs and ground covers, following spacing recommendations.
- Protect young plants from animals with fencing or other methods.
Water is where design pays off most. The USDA tipsheet recommends drip irrigation for densely planted food forests to avoid leaf mold. We design and install irrigation systems, and our guides on vegetable garden irrigation and solar-powered irrigation for home gardens show how a system can be sized to the garden.
How long establishment takes
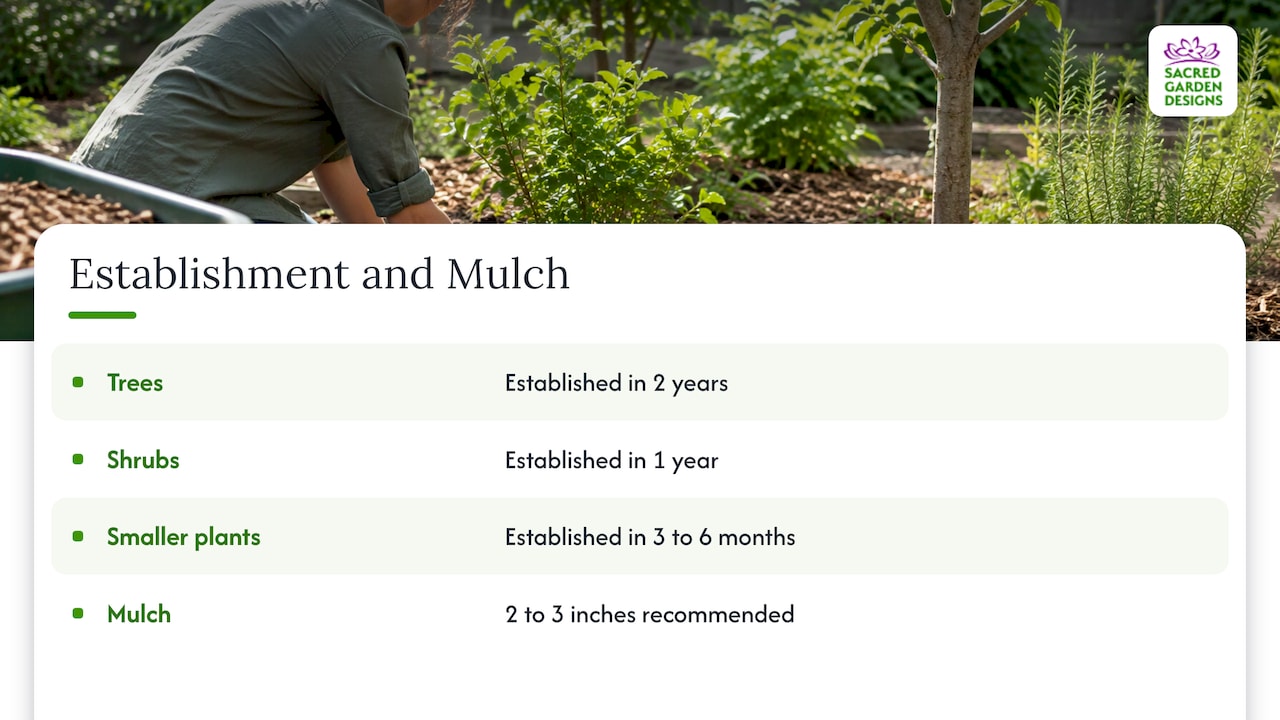
UF/IFAS defines a plant as established once it survives without irrigation. Trees typically take 2 years to get there, shrubs 1 year, and smaller plants 3 to 6 months. The same guidance recommends 2 to 3 inches of mulch plus micro-irrigation to conserve water. Plan your watering schedule around those stages, not around the calendar, and adjust for local watering rules where they apply.
Add stormwater features to the design
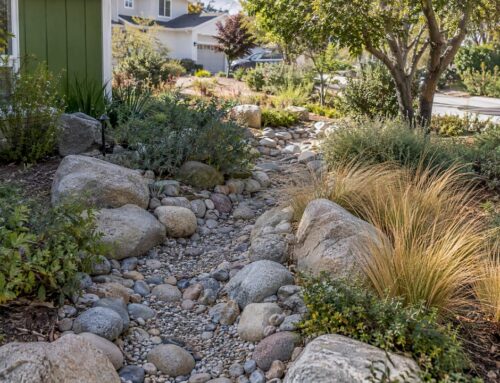
A food forest is a natural place to catch rain. Basins, swales and mulched depressions slow runoff, let water soak in, and reduce what you have to pipe in. NCAT lists swales, berms, terraces and ponds as the earthworks that slow and capture water. The right feature depends on slope and soil, so it belongs in the drawn plan. Our guide to stormwater management landscaping walks through features, design and upkeep. Where a property has a surface-water problem that needs piping rather than planting, a trench drain approach is one way to move water off the site.
Perspective
We design edible landscapes for a living, and the pattern we see in the plan stage is that people choose plants first and the site second. Reverse that. The site tells you how much sun reaches each layer, where water wants to go and how much of it you will have to supply. Once those answers are on paper, plant choice becomes almost easy.
Our approach combines artistry and environmental awareness, and in a food forest that means two things at once. The garden has to be productive, and it has to be somewhere you want to sit. Paths, seating, a patio or a retaining wall are part of the same drawing as the pawpaw and the blueberries. A garden you enjoy is a garden you keep up.
Water-wise design is our core work, which is why we think of irrigation, mulch and earthworks as design decisions rather than afterthoughts. A food forest planned around water use is more resilient in a dry year, and every year is a dry year somewhere. That is the case for planning the whole system together, from the slope to the trees to the drip lines.
Denise Buchanan
Let us design yours
If you want a food forest that fits your yard, climate and water supply, our landscape design service produces the plan. Landscape design for yards under 5,000 sq. ft. is $1,500, and a Full Landscape Design is $2,500. When you are ready to build, we also do sustainable landscape design and installation, irrigation, slope stabilization, hardscape, tree trimming and garden maintenance, all listed on our services page. If you would rather learn the craft, we run classes and workshops.
Bring your site photos and your wish list to the first conversation, and we can start from there.
FAQ
What are the seven layers of a food forest?
The layers are overstory, understory, shrub, herbaceous, root, ground cover and vine, as Project Food Forest lists them. Some designers add a mushroom layer as an eighth. Each layer fills a different height or root depth so plants can share one footprint.
How big does a backyard food forest need to be?
There is no minimum, but the size of the plan has to match mature plant sizes. Keep trees at least 15 feet from buildings and shrubs about 3 feet, per UF/IFAS guidance. In a small yard, choose dwarf trees and use fences and trellises for climbers.
How long until a food forest produces?
Annual vegetables and herbs give food in the first season, since they sit in the quick layers. Trees take longer, and UF/IFAS says trees typically need about 2 years to establish, shrubs 1 year and smaller plants 3 to 6 months. Harvests grow as the layers fill in.
Do all the plants have to be edible?
No. UF/IFAS notes that some plants are there to supply biomass, fix nitrogen, block wind, deter pests or attract beneficial insects. A mix of edible and supporting species keeps the system healthy.
Sources
- Falling for Food Forests? UF/IFAS Extension Duval County
- Preserve ecosystems in home landscapes, Mississippi State University Extension
- Planning a Food Forest, UF/IFAS Gardening Solutions
- USDA Plant Hardiness Zone Map downloads
- Introduction to Forest Garden Planning, Design, and Maintenance, NCAT
- Urban Agroforestry Tipsheet: Food Forests and Beyond, USDA Forest Service and NCAT
- Call 811 Before You Dig, Texas811
- What’s a forest garden, anyway? National Association of State Foresters
- Florida-Friendly edible landscaping, UF/IFAS Extension
- How to start a food forest in your central Florida yard, UF/IFAS Extension Polk County
- Edible Landscaping & Food Forest, South Dakota State University Extension
- What is a Food Forest? Project Food Forest
- 15 Minute Yard Tests to Stop Roof Runoff for Homeowners
- Trench Drains in Denver: Effective Surface Water Management