Two decisions govern almost every successful community garden: which management model you pick (individual plots or shared cooperative beds) and how honestly you map your site’s sun, water, and access constraints. Start with a short site survey and a co-design workshop with future gardeners before anyone drives a stake into the ground. Get those two right, then phase the build so people see progress fast.
TL;DR:
- Most garden participants prefer individual plots if consistent weekly labor is available, while shared beds suit groups with limited volunteer time or for educational purposes.
- A proper site map must include scale, site boundaries, trees, utilities, and sun patterns, with careful tracking of shadows and soil contamination before design.
- Main paths should be at least 5 to 6 feet wide for easy access, with secondary paths and emergency routes requiring 3 to 10 feet, depending on their purpose.
- In-ground plots should be around 10 by 10 feet, while raised beds should stay within 4 by 8 or 4 by 10 feet for optimal reach, with height adjustments for accessibility.
- Water taps should be within 50 feet of each bed, with irrigation methods chosen based on group needs, and compost areas placed in shaded, accessible locations with a simple rotation system.
Table of Contents
- What Is the Best Community Garden Design Model to Start With?
- How Do You Map a Community Garden Site Before Building?
- How Wide Should Community Garden Paths Be?
- What Size Should Community Garden Plots and Raised Beds Be?
- Where Should Water Taps and Compost Go in a Community Garden?
- What Structures Does a Community Garden Need?
- Which Plants and Materials Work Best in Community Gardens?
- How Do You Get Community Buy-In for a Garden Design?
- Author perspective: lessons from a design-build practice
- How Sacred Garden Designs Can Help You Build This
- Sources
- FAQ
What Is the Best Community Garden Design Model to Start With?
Every layout decision, from fence height to shed placement, flows from one early choice: plots or cooperative. A plot-based design assigns individual growing spaces to members or families, who manage their own soil, planting, and harvest. A cooperative garden pools labor and harvest across the whole group, working shared beds together on a set schedule. Plot gardens tend to build steady, long-term commitment because people invest in a space that’s theirs. Cooperative gardens work better for food banks, school programs, or groups short on volunteers who can show up every week.
Your program priorities should drive the model, not the other way around. A garden built mainly for education needs open sightlines and gathering space near the beds. One built for food production wants maximum growing square footage and less lawn. A beautification-focused garden might lean toward flowering borders and public-facing curb appeal.
Run through this before you sketch anything:
- Do most participants want individual ownership of a space, or shared responsibility for a common harvest?
- Will the group have consistent weekly labor, or does attendance swing widely?
- Does the site need to double as a teaching space, a production plot, or a neighborhood gathering spot?
- How will you divide storage and fencing costs between individual plots versus one shared perimeter?
Plot gardens typically need more internal fencing and individualized storage. Cooperative gardens simplify storage into one shed but require tighter scheduling.
How Do You Map a Community Garden Site Before Building?
Nothing in this project should get designed before the base map exists. A proper base map shows scale, a north arrow, site boundaries, mature trees, structures, underground utilities, and paved or drainage-prone areas. Skip any of those and you’ll find out the hard way, usually when a backhoe hits a gas line or a bed you built in April sits in shadow by July.
Work through the survey in this order:
- Walk the boundary and sketch it to rough scale, marking existing trees, fences, and structures.
- Call your local utility locator service before any digging is planned, and mark underground lines on the map.
- Track sun and shade across a full week, at morning, midday, and late afternoon, noting where shadows fall as the sun moves.
- Note wind direction and any low spots where water pools after rain.
- Pull a soil test through your local extension office, and screen for lead or other contaminants if the site was previously industrial, a demolished structure, or a roadside lot.
If soil tests come back with elevated contaminants, or the existing dirt is heavy clay or construction fill, raised beds with imported soil are the safer call over in-ground plots.
Pro Tip: Take your sun and shade photos from the exact same spot each time, using a phone tripod or a marked stake. It turns a week of guessing into a real record you can hand to your design workshop.
How Wide Should Community Garden Paths Be?
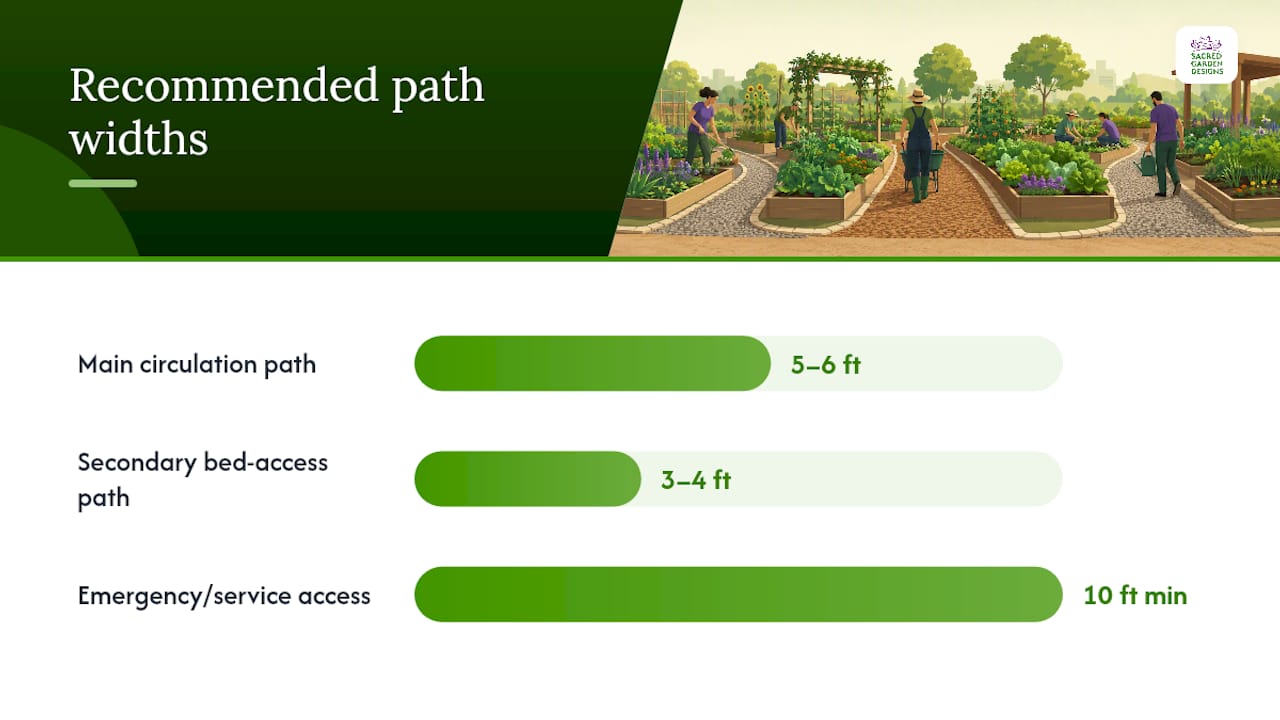
Paths get underbuilt more often than anything else in a garden design, and it shows within the first season. Main paths need to run 5 to 6 feet wide so two people can pass comfortably and a loaded wheelbarrow doesn’t clip a bed edge. Secondary paths between individual beds can narrow to 3 to 4 feet. Three feet is genuinely the floor, not a target. Anything narrower turns into a bottleneck the first time two gardeners meet with wheelbarrows going opposite directions.
Emergency and service access deserves its own line item. A minimum 10 foot wide entry point, kept unblocked at all times, lets emergency vehicles, delivery trucks, or a mower reach the interior of the site. Gate it if you need security, but never with a lock that only one person holds a key to.
| Path type | Recommended width | Common materials |
|---|---|---|
| Main circulation path | 5 to 6 feet | Mulch, gravel, permeable pavers |
| Secondary bed-access path | 3 to 4 feet | Mowed grass, mulch, stepping pavers |
| Emergency or service access | 10 feet minimum | Compacted gravel or gravel with grid pavers |
Mulch paths are cheap and easy on the knees but need topping off yearly. Gravel holds up longer with less maintenance but drains poorly on flat ground. Permeable pavers cost more up front and handle wheelchairs and wheelbarrows best of the three, with almost no ongoing upkeep.
What Size Should Community Garden Plots and Raised Beds Be?
Plot size depends entirely on your model and how much labor each gardener realistically has. Individual in-ground plots commonly run 10 by 10 feet, 10 by 20 feet, or 20 by 20 feet, scaling with available land and expected commitment. A first-time gardener does better starting at 10 by 10 than getting handed 400 square feet and abandoning half of it by July.
Raised beds follow a different logic entirely, one built around reach, not total square footage:
- Standard raised beds run 4 feet by 8 feet or 4 feet by 10 feet, keeping the 4 foot width so anyone can reach the center from either side without stepping in.
- Beds set against a wall or fence, with access from only one side, should stay 2 to 3 feet wide.
- Bed height for standing gardeners typically runs 12 to 24 inches; wheelchair-accessible beds need 24 to 30 inches of height with knee clearance underneath.
- Bench-integrated beds, with a seat rail built into the frame, let seated gardeners rest partway through a task without leaving the plot.
The 4-foot rule isn’t arbitrary. Most adults can comfortably reach about 2 feet into a bed, so a 4-foot width lets both sides of a two-sided bed meet in the middle without anyone stepping on the soil and compacting it.
Where Should Water Taps and Compost Go in a Community Garden?
Water access decides whether a garden thrives or slowly dies of neglect. Locate spigots so no bed sits farther than about 50 feet away, which keeps hand-watering realistic instead of a chore people quietly stop doing by August.
Your irrigation options each carry trade-offs worth weighing before install day:
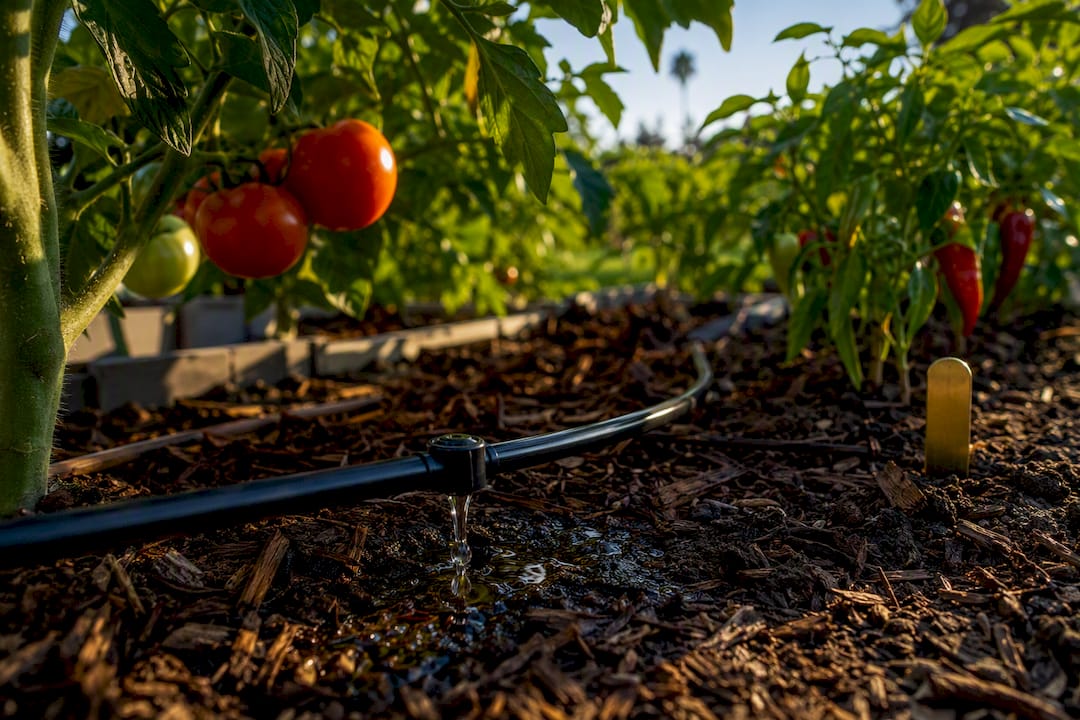
- Drip irrigation on timers cuts water waste dramatically and works well for cooperative beds where nobody’s individually responsible for watering.
- Hand-watering with hoses fits smaller plot gardens where each gardener wants direct control over their own soil moisture.
- Rain barrels tied to a shed roof or nearby structure supplement tap water for free, though they run dry fast in extended heat.
- Ollas (unglazed clay pots buried near roots) deliver slow, steady moisture directly to the root zone with almost no evaporation loss.
Site the compost area in a dry, partly shaded spot, away from the entrance and downwind of any seating. A three-bin rotation system (fresh material, breaking down, finished compost) works for most gardens under an acre. Keep a simple sign-out sheet or tool board near the compost or shed so shovels and forks don’t wander off mid-season.
Pro Tip: Group plants by water need, not just by species family. A tomato and a rosemary bush next to each other will fight over irrigation timing all summer.
What Structures Does a Community Garden Need?
A shed sized around 8 by 10 feet handles tools, hoses, and bagged soil amendments for a garden serving 20 to 40 plots. Place it near the entrance so volunteers aren’t hauling wheelbarrows across the whole site to grab a rake.
Beyond storage, a handful of built elements turn a plot of dirt into a place people want to spend time in:
- A bulletin board near the main gate for schedules, plot assignments, and safety signage keeps everyone informed without a group text chain.
- Restroom access, whether a rented port-a-john or a screened composting toilet, matters more than most first-time organizers expect, especially for gardens hosting workdays over several hours.
- Benches and a picnic table near the shadiest corner of the site give people a reason to linger after they’ve watered, not just work and leave.
- A small pavilion or shade sail over the gathering area extends usable hours during peak summer heat.
- Fencing should balance security against openness. A 4-foot chain-link fence deters wandering foot traffic without feeling like a cage, while a taller wood or vinyl fence adds privacy at higher cost and more maintenance.
A project gallery like this one shows how durable hardscape materials hold up over years of heavy foot traffic, worth a look before you commit to a path or seating material.
Which Plants and Materials Work Best in Community Gardens?
Native, pollinator-friendly plants cut long-term maintenance because they’re already adapted to your regional rainfall and soil, meaning less supplemental water and fewer pest problems than ornamentals shipped in from a different climate zone.
Vertical growing multiplies usable space on a site that’s almost always smaller than everyone wants. Trellises along fences, wall-mounted planters, and A-frame structures for vining crops like cucumbers and beans let you grow more without expanding the footprint. Watch shadow patterns carefully though. A trellis built on the south edge of a plot can throw shade over a neighbor’s tomatoes by midsummer.
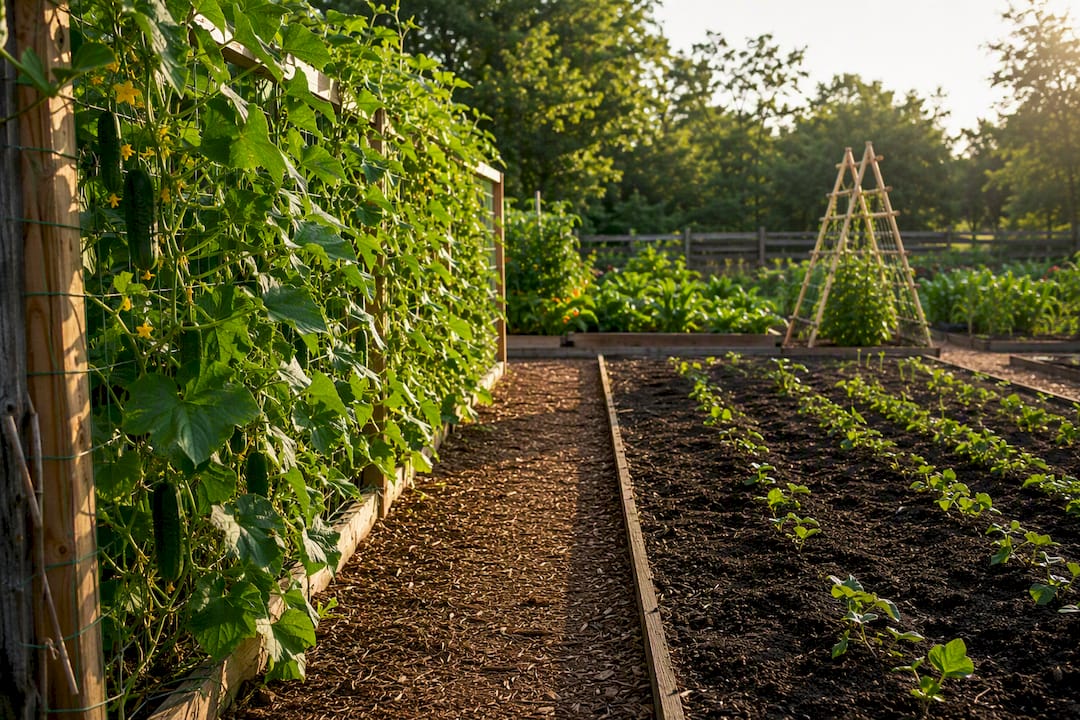
The smartest gardens design elements that do more than one job. A trellis that supports climbing beans can also screen a chain-link fence and cast afternoon shade on a seating area. A row of tall sunflowers doubles as a privacy screen and a pollinator magnet.
Even a plain perimeter wall becomes useful once you think past its original purpose. A pale-colored wall on the shady side of the garden reflects extra light into a dim corner, and any vertical surface, painted trellis panel, or fence section can carry additional planting if you attach simple wire grids or pocket planters. Species selection for shade trees or windbreaks matters here too; choosing the right tree for your site’s soil and sun pattern avoids years of slow growth or an unexpected root problem near a foundation.
Pro Tip: Before installing any vertical structure, walk the site at 3 p.m. in midsummer and check where the shadow actually falls. Morning shade patterns lie to you about afternoon reality.
How Do You Get Community Buy-In for a Garden Design?
The gardens that last are co-created, not handed down from a committee of three. Public design workshops where participants set their own priorities lead directly to higher adoption and longer-term success than a plan drawn up in isolation and presented as finished.
Run your workshop with movable pieces, not a static drawing. Cut scaled shapes representing beds, paths, and the shed out of cardboard or paper, and let participants physically rearrange them on the base map until the group reaches something close to consensus. This process surfaces disagreements early, when they’re cheap to resolve, instead of after concrete’s already poured.
A practical sequence for the first year:
- Draft governance basics before the first bed goes in: plot assignment rules, a simple dues structure if you’re charging one, workday expectations, and a written process for handling disputes between gardeners.
- Build phase one as a minimum viable garden: the beds, one water source, basic paths, and the emergency access gate. Nothing fancy, just functional.
- Add phase two once the garden has a season under its belt: shed, seating, signage, and any fencing upgrades the group actually wants after living with the space.
- Reserve phase three for expansions, additional plots, a pavilion, or an orchard corner, once the group has proven it can sustain what already exists.
Author perspective: lessons from a design-build practice
Gardens that succeed almost always start smaller than the wish list and grow from there. Showing visible progress in the first six weeks, even just beds and a working tap, keeps volunteers engaged far better than a perfect master plan that takes a year to break ground.
Phasing water systems matters more than most groups expect. Getting one reliable spigot running before worrying about drip lines or ollas prevents an entire summer of frustrated hand-watering. Coordinate build days around clear, single-task assignments; a crew building beds and a crew running irrigation trenches on the same afternoon works far better than everyone attempting everything at once.
— Denise Buchanan
How Sacred Garden Designs Can Help You Build This
If your group has the site survey done and the community priorities mapped out but needs someone to turn that into working drawings and an installed system, a professional landscape design firm can help ensure the irrigation layout, path materials, and accessible bed heights are specified correctly the first time, not redesigned after a season of trial and error.
Sacred Garden Designs offers co-designed planning sessions, custom irrigation design built around your actual water access points, and phased installation schedules that match how your group’s budget and volunteer hours actually flow. That last part matters most for community projects. A phased build plan lets you fund and construct the minimum viable garden now, then add the shed, seating, and vertical growing structures as the second phase without redoing existing work. Groups also lean on the project blog for planning notes from past community installs.
Ready to move past the sketch stage? Request a consultation and bring your base map. That single meeting usually turns a rough plan into a buildable one.
Sources
For deeper technical detail beyond this guide, NC State Extension’s community garden organizing guide covers plot sizing and governance, while UF/IFAS publishes a community garden design fact sheet with base map templates. The archived Let’s Move community garden checklist remains a solid one-page planning reference.
- How to Organize a Community Garden | NC State Extension
- Community Garden Design fact sheet | UF/IFAS
- Community Food Garden Design | NC Community Gardens (NC State Extension)
FAQ
How Do You Design a Community Garden?
Start with a site survey covering sun, soil, and utilities, choose between a plot or cooperative model, then co-design the layout with future gardeners before finalizing paths, plot sizes, and water access.
What Is the 70/30 Rule in Gardening?
Definitions of this rule vary by source and region, so treat any specific ratio with caution; a more reliable planning principle is dedicating the majority of usable space to growing beds while reserving the remainder for paths, gathering areas, and storage.
What Should Be in a Community Garden?
A well-planned community garden includes growing beds sized for the chosen model, main paths at 5 to 6 feet wide, a water source within about 50 feet of every bed, a compost area, a tool shed, seating, signage, and a 10-foot emergency access point.
What Is a Good Size for a Community Garden Plot?
Individual in-ground plots commonly run 10 by 10 feet for beginners up to 20 by 20 feet for experienced growers, while raised beds typically measure 4 feet by 8 feet or 4 feet by 10 feet to keep the growing area within comfortable reach.