For most home gardeners, the reliable setup is a solar panel driving a pump that fills a holding tank, with gravity or a small pressure pump feeding drip lines from there. That tank-buffered approach shrugs off a cloudy afternoon, delivers water efficiently through drip emitters, and follows a simple sizing rule: match pump flow to your panel wattage with a moderate overhead to ensure reliable operation. Skip the tank only for a handful of container pots; add a battery only if you require irrigation outside daylight hours
TL;DR:
- Most home gardens benefit from a solar-powered system with a tank buffer, which provides reliable watering during cloudy weather and simplifies system sizing.
- A typical DIY setup costs between $325 and $510, including a 100–200 watt solar panel, a 12V or 24V pump, a 275-gallon tank, and appropriate filters.
- Pump size should be based on daily water needs divided by peak sun hours, with the panel wattage scaled by 1.25 to 1.3 times the pump’s watt draw.
- Water source type determines pump choice, with surface diaphragm pumps for rain barrels, submersible pumps for shallow wells, and deep-well pumps for lifts over 25 feet.
- For most home gardens, direct-drive solar with a tank provides sufficient reliability, and adding batteries is unnecessary unless the system requires on-demand operation outside sunlight hours.
Table of Contents
- What You Need for a Solar Irrigation Setup
- Which Pump Fits Your Water Source?
- Do You Need a Battery, or Just a Bigger Panel?
- Tank-Buffered or Direct-Drive: Which Delivery Method Fits?
- Getting the Plumbing and Filtration Right
- How to Lay Out and Install Your Drip Network
- How Do You Commission and Maintain a Solar Irrigation System?
- Why Experience Matters for More Complex Installs
- Why Tank-Buffered Drip Is the Right Default
- Let Sacred Garden Designs Handle the Complex Parts
- Sources
- FAQ
What You Need for a Solar Irrigation Setup
Before you order anything, get the parts list right. A basic solar irrigation setup for a backyard vegetable plot needs six categories of hardware, and skimping on any one of them is how gardeners end up with a pump that burns out in July.
- Solar panel(s): solar panels between 100 and 200 watts typically cover most quarter-acre or smaller gardens, depending on pump draw
- Pump: a 12V or 24V DC pump rated around moderate flow rates typical for a home garden, generally a few gallons per minute
- Tank: a holding tank such as an IBC tote or rain barrel sized to store at least one day’s water demand
- Filtration: a 150-mesh disc filter, which the Utah State Extension recommends as standard protection for drip emitters.
- Tubing and emitters: half-inch mainline, quarter-inch drip line, and pressure-compensating emitters matched to plant spacing.
- Controller and fittings: a simple on/off controller or MPPT unit, ball valves, and a float valve for the tank.
Sizing follows a straightforward chain of math. First, estimate your daily water need in gallons (a 500 square foot vegetable garden typically needs 150 to 200 gallons a day in peak summer). Divide that by your local peak sun hours (commonly 5 to 6) and your system efficiency (assume 0.7 to 0.8) to get required pump flow. Multiply the pump’s power draw by 1.25 to 1.3 for panel wattage, per the redundancy factor the ZRI design guide recommends.
- Estimate daily gallons needed (measure or use crop water tables).
- Divide by peak sun hours to get required flow rate in GPM.
- Choose a pump rated at or slightly above that flow.
- Multiply pump wattage by 1.25–1.3 for panel size.
- Round up to the nearest common panel size (100W, 150W, 200W).
For that 500 square foot garden, you’re likely looking at a 3 GPM pump, a 150W panel, a 275 gallon IBC tote, and a 150-mesh filter. Total component cost for a DIY setup like this typically runs $325 to $510, before you factor in a deeper well or a larger array.
Pro Tip: Buy your pump first, then size the panel to it. Buying the panel first and hoping a pump matches is backwards, and it’s how people end up with mismatched voltage.
Which Pump Fits Your Water Source?
Your water source dictates your pump choice more than any spec sheet does. A rain barrel or IBC tote sitting above ground calls for a small surface diaphragm pump. A pond or shallow well needs a submersible pump rated for its depth. A deep well, anything past 25 feet of lift, needs a purpose-built deep-well solar pump, and that’s usually where a DIY build starts brushing up against professional territory.
Dry-run protection matters more than gardeners expect. Ponds drop in late summer, wells can outpace their recharge rate, and a pump running dry burns out fast. Match your pump’s rated flow to your source’s actual yield, not just your garden’s demand. A design tradeoffs paper from ICID makes this point directly: oversizing a pump without confirming source yield is one of the most common ways installations fail early.
- Surface diaphragm pumps: best for barrels, totes, and shallow ponds.
- Submersible pumps: best for ponds and wells under 25 feet.
- Deep-well solar pumps: needed past 25 feet of lift, and worth a professional consult.
Filtration needs two stages. Put a coarse pre-filter or foot valve strainer on the intake hose to catch debris before it reaches the pump, then run a 150-mesh disc filter after the pump and before your drip lines. Prime the pump before first use, and keep the intake hose weighted below the waterline but off the bottom, where sediment collects.
Pro Tip: If your pond or barrel level swings a lot, wire in a float switch. It costs about as much as a nice garden hose and saves you a pump.
Do You Need a Battery, or Just a Bigger Panel?
Most home garden setups don’t need a battery at all. If you’re filling a tank during the day and irrigating later with gravity or a small pressure pump, a direct-drive solar connection works fine. Batteries earn their cost when you need the pump running before sunrise, after sunset, or on demand regardless of weather, which is rare for a tank-fill design.
Panel sizing follows the same rule from the previous section: pump wattage times 1.25 to 1.3 for redundancy. Voltage has to match too. Most small DC pumps run 12V or 24V, and mismatching a 24V pump to a 12V panel array simply won’t work.
- Direct-drive: cheaper, simpler, ideal for tank-fill systems that only need daylight pumping.
- Battery-backed: needed for on-demand pumping or irrigation timed outside sun hours.
- Panel orientation: face true south (northern hemisphere) and tilt roughly to your latitude for peak output.
A few electrical basics protect your investment. Run an inline fuse between the panel and pump. Use cable gauge rated for your pump’s amperage and run length, since a run over 25 feet on undersized wire loses real voltage. None of this is complicated, but skipping it is how a $150 pump becomes a $150 paperweight.
Tank-Buffered or Direct-Drive: Which Delivery Method Fits?
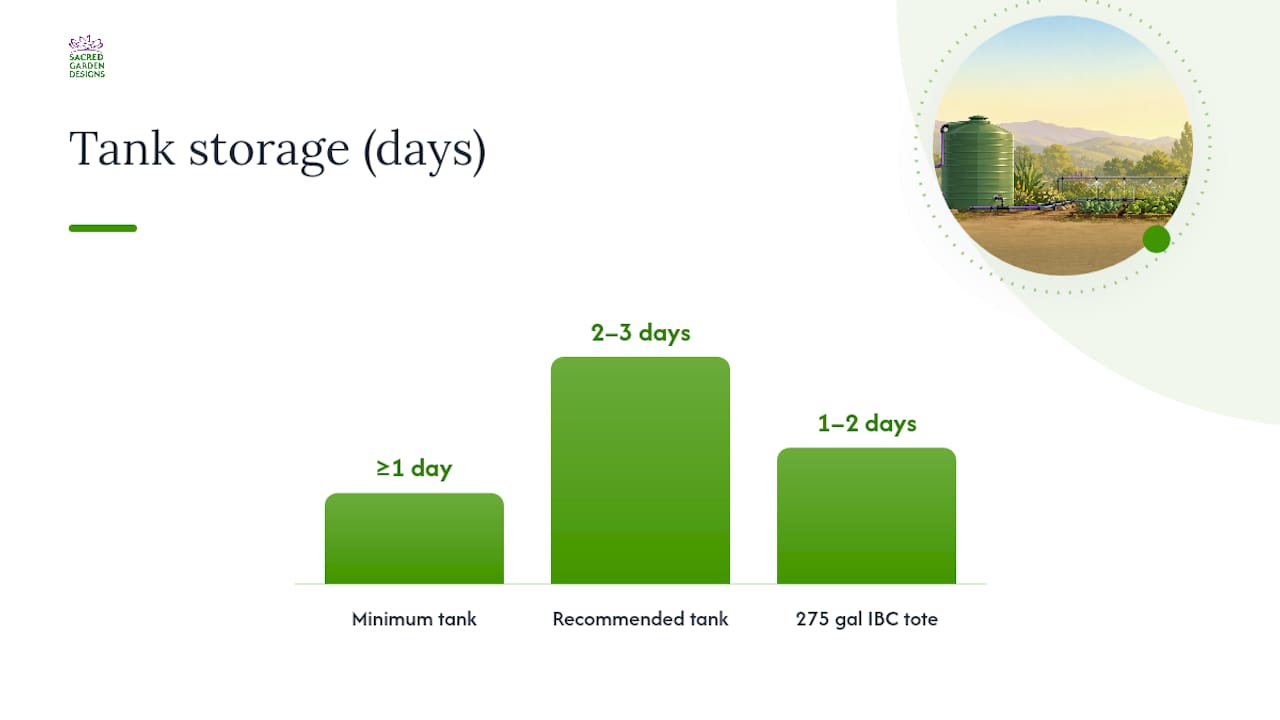
A tank between your pump and your drip lines is what makes a solar irrigation setup forgiving. It decouples when the sun shines from when your plants get watered, so a cloudy morning doesn’t mean dry beds. Direct-drive, where the pump feeds drip lines straight from the panel with no buffer, only makes sense for a handful of containers where a missed watering isn’t a crisis.
Size your tank to hold at least one full day of irrigation demand, and two to three days if your budget allows. An off-grid orchard case study from Oregon State’s small farms program recommends storing water rather than battery power specifically because tanks are cheaper and more forgiving than batteries over a system’s lifetime.
- Elevation gives you roughly 0.43 PSI per foot of height, so a 10-foot elevated tank yields about 4.3 PSI, enough for basic drip flow.
- Multiple zones or drip tape runs longer than 100 feet usually need a small pressure pump rather than gravity alone.
- A 275-gallon IBC tote covers a day or two for most quarter-acre gardens.
Getting the Plumbing and Filtration Right
Plumbing layout is where a lot of DIY solar irrigation setups quietly go wrong. Keep your mainline under 200 feet and branch lines under about 100 feet. Longer runs bleed pressure, and OffGridFoundry’s drip irrigation guide flags that as the point where flow starts dropping unevenly across a garden.
Filtration works in two stages, as covered earlier: coarse pre-filter at the intake, then a 150-mesh disc filter right after the pump. Clean that disc filter every two to four weeks during growing season, more often if your water source carries algae or silt.
- Install a pressure regulator after the filter if your elevation or pump delivers more than 25 PSI, since most drip emitters are rated for 15 to 25 PSI.
- Use pressure-compensating emitters on any run longer than 50 feet or with elevation changes.
- Add a float valve inside the tank to stop pump overflow automatically.
Pro Tip: Install a clear inline filter housing instead of an opaque one. You’ll see clogging building up before flow actually drops, which saves you a troubleshooting session later.
How to Lay Out and Install Your Drip Network
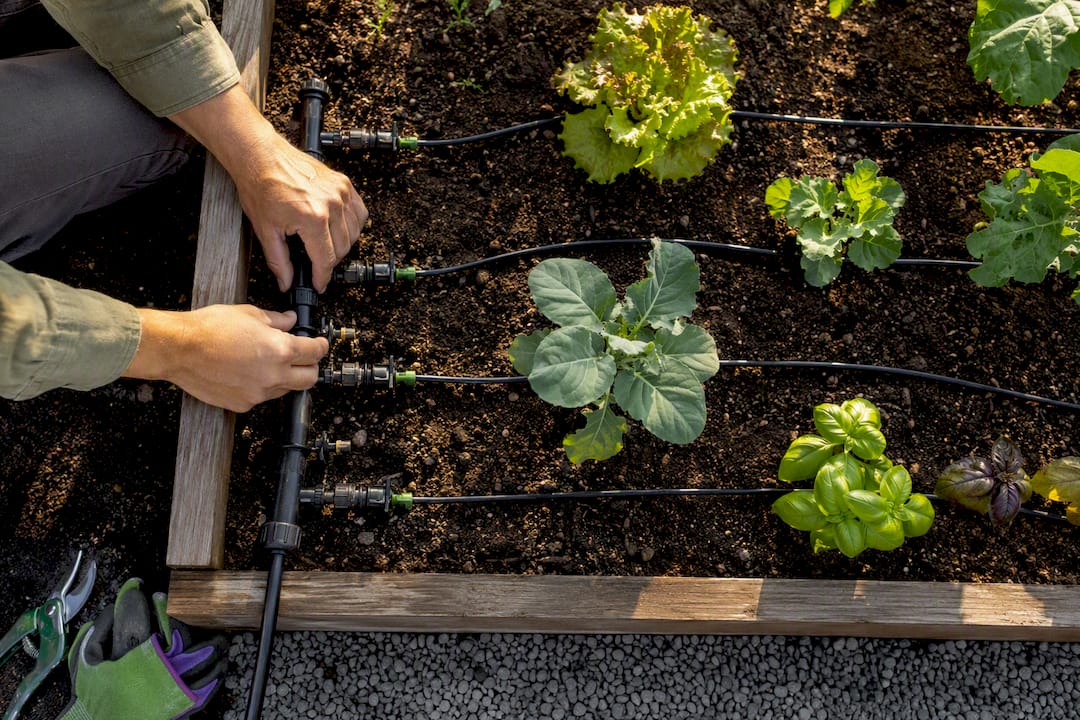
Emitter choice depends on what you’re growing. Vegetables in rows generally do well with 1 GPH emitters spaced every 12 inches; larger perennials or shrubs need 2 GPH emitters spaced further apart. For a 500 to 1,000 square foot garden, that typically works out to 40 to 80 emitters total, drawing somewhere between 40 and 80 GPH combined, well within a 3 to 5 GPM pump’s capacity.
Group plants into zones by water need rather than location. Tomatoes and peppers can share a zone; herbs that prefer drier soil belong on their own.
- Lay out mainline tubing along garden beds, keeping it as level as possible.
- Punch holes and attach drip emitters or micro-tubing to plant locations.
- Cap the far end of each line securely.
- Flush the system with the filter removed to clear debris before final assembly.
- Reinstall the filter, then test each zone individually for even flow.
If one zone runs weak while others run fine, check for a kink first, then a clogged emitter, then confirm your zone isn’t simply too long for the available pressure.
Pro Tip: Test zones one at a time, not all together. Running everything at once masks exactly which line has the problem.
How Do You Commission and Maintain a Solar Irrigation System?
Before you call it done, verify performance against what you designed for. Measure actual pump draw with a multimeter, time how long the tank takes to fill, and check pressure at the far end of each zone with a cheap gauge. If a zone reads low, you’ve likely undersized tubing or run it too long.
- Confirm pump amperage matches panel output under midday sun.
- Time the tank fill rate and compare it to your daily demand calculation.
- Check pressure and flow at the last emitter on each zone.
- Verify any dry-run cutoff or float switch actually stops the pump.
Ongoing maintenance is light if you stay ahead of it. Clean the disc filter every two to four weeks, flush emitter lines each season, and check tank walls for algae buildup, especially in translucent totes exposed to direct sun. For stretches of cloudy weather, plan around your tank’s buffer days rather than expecting the pump to keep pace in real time. That’s the whole point of storing water instead of relying on constant sun.
Pro Tip: Paint or wrap a clear IBC tote to block light. Algae needs sunlight to grow, and a shaded tank stays clean for months longer.
Why Experience Matters for More Complex Installs
Denise Buchanan writes on sustainable landscaping and water-wise irrigation design. The author has experience in sustainable landscaping and water-wise irrigation design, recognized in relevant industry contexts. That kind of experience matters most once a project moves past a backyard drip line into deep wells, larger arrays, or multi-zone commercial installs, where electrical permitting and hydraulic design get complicated fast. If your project involves a well deeper than 25 feet, an array larger than a few panels, or grid-tied electrical work, bring in a professional rather than troubleshooting it solo.
Why Tank-Buffered Drip Is the Right Default
Battery-backed, fully automated solar irrigation looks impressive on paper, but for most home gardens it solves a problem you don’t have. Tank-buffered drip is cheaper, more forgiving, and easier to fix when something goes wrong. Reuse an IBC tote if you can find one, favor low-flow emitters over high-volume ones, and harvest rain where your local rules allow it. Build the simple version first. You can always add sensors and automation once you trust the basics.
— Denise Buchanan
Let Sacred Garden Designs Handle the Complex Parts
Professional services are available that handle pump specs and panel sizing by assessing your water source and garden layout, providing parts specifications or installation, including site assessment, system design, installation, maintenance, and solar-powered irrigation kits sized for home gardens rather than commercial farms.
A consult typically covers sizing calculations, a parts list matched to your water source, and an installation estimate before you spend a dollar on hardware. If your garden’s water source is a deep well, your array needs exceed a couple of panels, or you’d rather skip the trial and error entirely, request a consultation through Sacred Garden Designs and get a system built around your actual yard, not a generic template.
Sources
- Ten considerations for solar irrigation (Utah State Extension)
- Farming off the grid: Building a solar-powered irrigation system (Oregon State small farms)
- Solar drip irrigation guide (OffGridFoundry)
- Solar irrigation system design guide (ZRI)
FAQ
Are Solar Irrigation Systems Any Good?
Yes, for most home gardens a tank-buffered solar pump paired with drip lines delivers reliable watering, and lifecycle costs often run 33 to 50% lower than diesel-powered alternatives despite higher upfront costs.
How Do You Set Up a Solar Automatic Watering System?
Size your daily water demand, match a pump to your water source’s yield, size the solar panel at 25 to 30% above pump wattage, add a 150-mesh filter, and run drip lines from a holding tank; automation with timers or moisture sensors can be added once the basic system runs reliably.
What Is the Best Solar Irrigation Setup for a Home Garden?
For most home gardeners, a solar panel filling an elevated tank that gravity-feeds or pressure-feeds drip lines is the most reliable configuration, since it keeps watering going through cloudy stretches without needing batteries.
How Much Does a Solar-Powered Irrigation System Cost?
A basic DIY solar drip system, including panel, pump, tank, filter, tubing, and emitters, typically costs $325 to $510, though deeper wells or larger arrays raise that considerably.