Most retaining walls over about two feet tall, or any wall backfilled with clay or built into a soggy slope, need a complete drainage system, not just weep holes. That system has four parts: a drain-stone zone directly behind the wall, a 4-inch perforated pipe at the base, non-woven filter fabric wrapping the stone, and an outlet that daylights the water somewhere safe. Weep holes alone can work only on short, free-draining walls with sandy backfill.
POINTS TO CONSIDER:
- Proper retaining wall drainage requires a four-part system: a drain-stone zone, perforated pipe, filter fabric, and daylighting outlet, especially for walls over two feet tall.
- The recommended minimum is 12 inches of angular #57 stone behind the wall and a 4-inch perforated pipe sloped at least 1%, with non-woven geotextile wrapping to prevent fines infiltration.
- Retrofitting existing walls involves assessing damage signs, adding or clearing weep holes, or installing a continuous drain system, but severe structural issues need professional evaluation.
- Common mistakes include using crushed stone instead of proper clean angular stone, skipping filter fabric, and installing un-sloped or blocked pipes, which can cause severe drainage failure.
- Regular inspections, twice annually and after heavy storms, are crucial to ensure the outlet remains clear and water drains efficiently to prevent hydrostatic pressure buildup.
Table of Contents
- What Goes Into a Proper Retaining Wall Drainage System?
- How Do You Install Drainage for a New Retaining Wall?
- Can You Add Drainage to an Existing Retaining Wall?
- When Do You Actually Need a Full Drainage System?
- What Are the Most Common Retaining Wall Drainage Mistakes?
- How Often Should You Inspect and Test Retaining Wall Drainage?
- What Materials Should You Choose for Retaining Wall Drainage?
- Sacred Garden Designs’ Approach to Drainage and Sustainability
- When Should You DIY vs Call a Professional?
- Get Professional Help With Retaining Wall Drainage and Design
- Where Can You Verify These Drainage Specs?
- Sources
What Goes Into a Proper Retaining Wall Drainage System?
Hydrostatic pressure, not soil weight, is what actually topples most retaining walls. Water gets trapped behind the block, saturates the backfill, and pushes outward with a force the wall was never engineered to resist. Every component in a retaining wall drainage system exists to get that water out before it builds up enough pressure to matter.
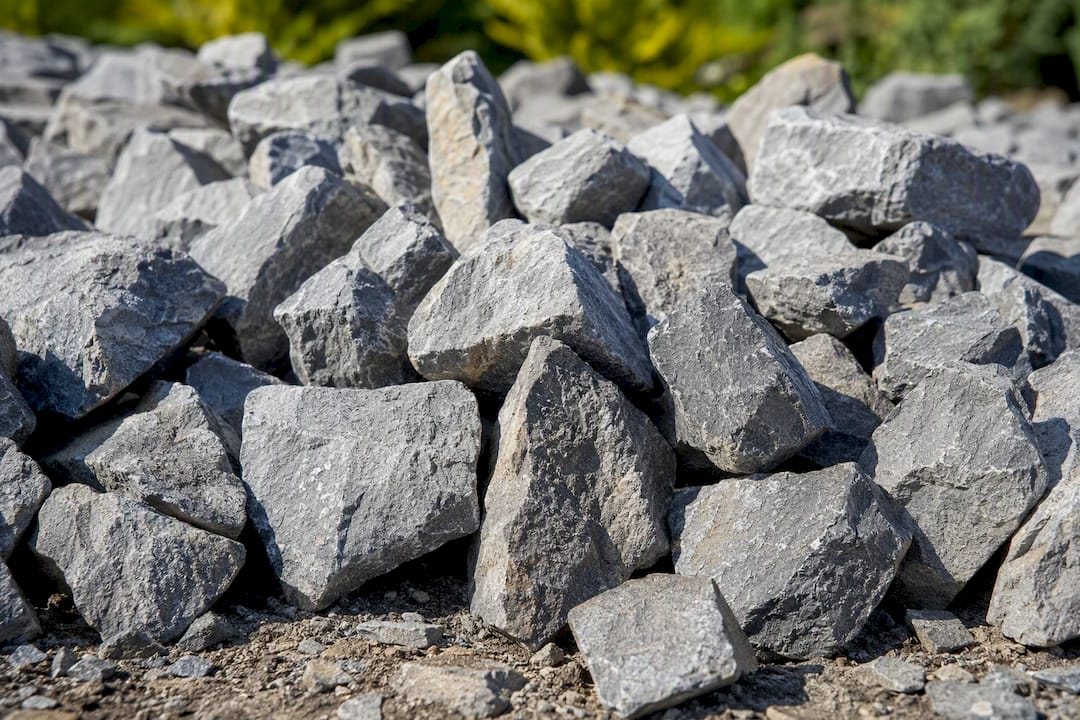
The drain-stone zone is the workhorse. This is typically #57 washed angular stone, crushed and screened so it has almost no fine particles clogging the gaps between rocks. Those voids are the whole point. Water needs somewhere to move, and angular stone locks together mechanically while leaving enough open space for gravity to do its job. Round river rock or pea gravel doesn’t interlock the same way and tends to shift over time. Manufacturer guidance from Allan Block calls for at least 12 inches of this stone directly behind the wall units, and that number is a floor, not a target to shave down on a tight budget.
The perforated pipe sits at the base of that stone zone and carries water to daylight. You’ll choose between rigid PVC and corrugated HDPE. PVC is stiffer, easier to keep on a consistent slope, and holds up better if a driveway or heavy soil load sits above it. Corrugated HDPE is cheaper and easier to snake around obstacles but can belly or trap water in low spots if you’re not careful with your excavation. Either way, the perforations go down, not up. That single detail trips up more DIY installs than anything else on this list, because water enters through those holes from below and along the sides, and holes pointed skyward just collect debris.
Filter fabric wraps the stone and pipe assembly to keep soil fines from migrating into the voids and choking the system over months and years. Non-woven geotextile is the correct choice here. It’s engineered to pass water while screening out silt and clay particles. Woven landscape fabric, the kind sold for weed suppression, does the opposite of what you need. It sheds water sideways instead of letting it pass through, which defeats the entire purpose of the drainage zone. This is one of the most common and costly retrofit mistakes homeowners make when they grab whatever fabric is already in the garage.
Weep holes still have a role, but treat them as a backup, not the main event. On a wall over roughly four feet, weep holes can’t move subsurface water fast enough during a heavy storm or sustained groundwater flow. A continuous base pipe running the length of the wall is what actually keeps pace.
Here’s how the four components typically break down by function:
- Drain-stone zone: angular #57 stone, minimum 12 inches wide, creates the void space water travels through.
- Perforated pipe: 4-inch PVC or HDPE, holes down, carries collected water to the outlet.
- Filter fabric: non-woven geotextile, wraps the stone envelope to block fines without blocking flow.
- Daylighting outlet: the exit point, whether that’s a hillside, a storm drain tie-in, or a dry well.
How Do You Install Drainage for a New Retaining Wall?
Get this sequence right on a new build and you’ll likely never think about drainage again. Rush it, and you’re looking at a bulging wall in five to ten years.
- Evaluate the site first. Walk the slope above where the wall will go and map where surface water naturally collects and flows. Mark any buried utilities before you touch a shovel, and check whether your municipality requires a permit for tying an outlet into a storm system, since many jurisdictions do.
- Excavate the drainage zone. Dig a trench at least 12 inches wide behind the wall face, running the full length. Depth depends on wall height, but the trench needs to reach below the base course of block and extend up close to grade.
- Line the trench with filter fabric. Lay non-woven geotextile along the excavated face and bottom of the trench with enough overlap to fully wrap the stone later. Leave several extra inches of fabric on each side; you’ll fold it over the top once the stone is in.
- Bed a few inches of stone, then set the pipe. Place a shallow bed of #57 stone in the trench bottom, then lay the 4-inch perforated pipe on top with perforations facing down. Set the pipe on a slope of at least 1%, ideally closer to 2%, so gravity does the work without any dead spots.
- Backfill around and over the pipe with stone. Surround the pipe completely, then continue filling the drainage zone with stone up to within a foot or so of finished grade. Fold the excess filter fabric over the top of the stone to seal the whole assembly before you backfill the rest with soil.
- Backfill in lifts above the drainage zone. Add soil in layers of roughly 6 to 8 inches, compacting each lift before adding the next. Skipping compaction here is how you end up with settling and surface depressions months later.
- Grade the finished surface to shed water away from the wall. A slight slope away from the top of the wall keeps surface runoff from adding to the load your drainage system already has to handle.
- Daylight the outlet or tie it into an approved feature. Route the pipe to open air on a slope, into a dry well, or into a storm connection where local code allows it. Protect the outlet end with a rodent guard or a small splash pad so it doesn’t silt in or become a chew toy for the local wildlife.
- Run the hose test before you call it finished. Pour water into the drainage zone from the top and watch the outlet. On a properly built system, water should emerge at the outlet within about 60 seconds. If nothing shows up, you’ve got a slope problem, a clog, or a disconnected pipe, and it’s far easier to fix now than after the wall is buried and landscaped.
Pro Tip: Do the hose test twice, once right after the pipe goes in and once more after backfilling is complete. The first test confirms the pipe itself works; the second confirms nothing shifted or got crushed during backfill.
Can You Add Drainage to an Existing Retaining Wall?
Yes, and retrofitting is common. It’s just more work than building it in from the start, and how much work depends on what’s already wrong.
Start by assessing access and looking for the telltale signs of a wall already fighting hydrostatic pressure: outward bulging, horizontal cracking, white mineral staining (efflorescence) where water has been wicking through the block, or damp soil that never seems to dry out even in summer.
Your retrofit options run from least to most invasive:
- Add or clear weep holes. If the wall already has weep holes that are clogged or missing entirely, drilling a few 2 to 4-inch holes near the base and adding a splash pad at ground level can relieve minor pressure. This helps small, low walls but won’t solve a chronic problem on anything taller.
- Spot excavation and partial trenching. Dig short sections along the base of the wall, install lengths of perforated pipe wrapped in filter fabric and bedded in stone, and connect them to a common outlet. This works well when the wall’s overall structure is sound and you just need to relieve pressure at specific wet spots.
- Full trench-and-install along the wall’s length. For a wall with widespread saturation issues, excavating a continuous trench behind the entire run and installing a proper pipe and stone system, as described above, gets you back to a real drainage system rather than a patch.
- Backfill replacement or partial rebuild. If the original backfill was clay or fines instead of clean stone, sometimes the only real fix is removing that backfill entirely and replacing it with a proper drainage envelope, which usually means partially disassembling the wall face.
Know when to stop. If you see significant lean, cracked or displaced blocks, or water that appears to be coming from a spring or a consistently high water table rather than surface runoff, that’s a signal to call a structural contractor or a geotechnical engineer rather than keep digging yourself. Manufacturers themselves recommend engineer consultation once groundwater migration or unexplained water sources are in play, because a drainage retrofit won’t fix a wall that’s already structurally compromised.
When Do You Actually Need a Full Drainage System?
The honest rule of thumb: a low garden wall, say under about two feet, built with sandy, free-draining backfill and minimal water exposure, can sometimes get by with weep holes alone. Almost everything above that height, or in clay soil, or anywhere near a slope that collects runoff, needs the full stone-pipe-fabric-outlet system.
Some concrete numbers to work from:
- Stone width: minimum 12 inches of #57 washed stone behind the wall face, per manufacturer guidance.
- Pipe size: 4-inch perforated pipe for standard residential walls; larger diameter for walls draining a large uphill catchment area.
- Slope: 1% minimum, 2% preferred, to keep water moving toward the outlet without stalling.
- Weep hole spacing: roughly every 4 to 6 feet along the base course when weep holes are used as a supplement, not a substitute, for pipe drainage.
- Wall height threshold: walls exceeding roughly four feet generally require a continuous base pipe rather than relying on weep holes.
Soil type shifts these numbers. Clay backfill holds water and drains slowly even with a correct system, so it’s worth upsizing the stone zone or adding a secondary chimney drain behind particularly tall sections. If you’ve got a spring, a seasonal seep, or any concentrated water source hitting the slope above your wall, that’s a special case. Technical guidance on wall drainage recommends adding chimney and blanket drains in these conditions and bringing in a geotechnical engineer to confirm the site can actually handle the volume you’re dealing with.
What Are the Most Common Retaining Wall Drainage Mistakes?
The same handful of errors show up again and again, and nearly all of them trace back to shortcuts taken to save time or money.
- Using crusher run or fines instead of clean stone. Crusher run compacts and clogs almost as badly as native soil, defeating the purpose of the drainage zone entirely.
- Skipping filter fabric, or using woven landscape fabric. Without non-woven geotextile, fines migrate into the stone and choke it within a few seasons; woven fabric blocks flow outright.
- Flat or uphill pipe runs. A pipe with no slope, or one that dips and rises, creates standing water pockets instead of moving water to the outlet.
- Buried or blocked outlets. An outlet covered by mulch, soil, or a deck addition years later stops working invisibly, since the wall looks fine right up until it doesn’t.
- Relying on weep holes alone for a tall wall. Weep holes can’t keep pace with heavy rain on anything beyond a low garden wall, and they offer no redundancy once they clog.
Pro Tip: If you inherited a wall you didn’t build and don’t know its drainage history, assume the worst and check the outlet first. A five-minute look often tells you more than any amount of guessing about what’s behind the block.
How Often Should You Inspect and Test Retaining Wall Drainage?
Check your wall’s drainage twice a year at minimum, once before the rainy season and once after, plus an extra look following any unusually heavy storm.
- Inspect the outlet. Confirm it’s clear of debris, mulch, or sediment buildup and that water is actually discharging after rain, not just sitting stagnant nearby.
- Check weep holes for flow or blockage. Even where they’re secondary, a clogged weep hole is an early warning sign worth noting.
- Look at the backfill and surrounding soil. Persistently damp or soft ground near the wall’s base, especially in dry weather, suggests water isn’t draining the way it should.
- Run the hose test periodically. Pour water into any accessible drainage zone and confirm it emerges at the outlet within roughly a minute, the same benchmark used during original installation.
- Prep for winter in freeze-prone climates. Clear outlets before the first freeze so trapped water doesn’t expand and crack pipe or block.
What Materials Should You Choose for Retaining Wall Drainage?
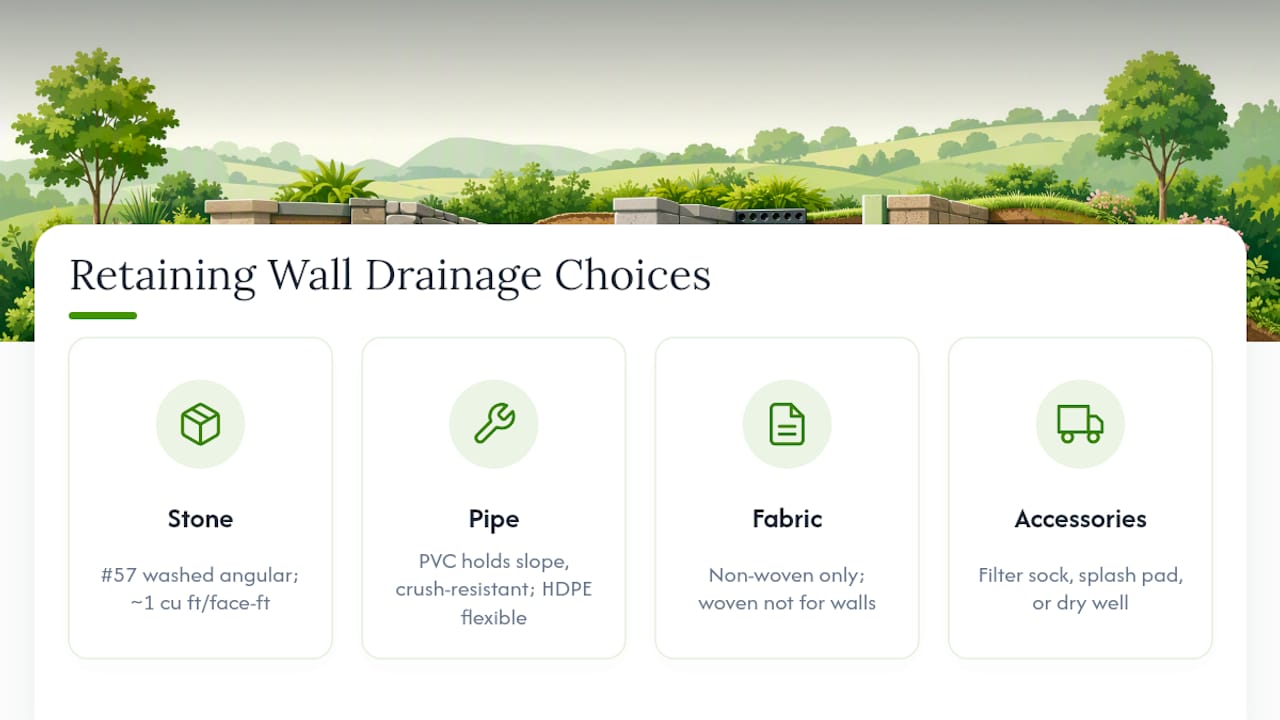
Stick with #57 washed angular stone for the drainage envelope. As a rough estimate, plan on roughly 1 cubic foot of stone per face-foot of wall for a standard 12-inch-wide, 12-inch-deep drainage zone, though taller walls or wider trenches will need more.
For pipe, PVC holds a slope more reliably and resists crushing under load, making it the better pick under driveways or heavy soil. Corrugated HDPE costs less and flexes around obstacles more easily, which suits winding retrofit trenches where rigid pipe would be a hassle to route. Either way, perforations face down, and any outlet exposed to open air deserves a rodent guard or armored end cap so nothing nests inside it.
For fabric, non-woven geotextile is the only real choice for a drainage envelope; woven landscape fabric belongs in a flower bed, not behind a wall. A few accessories round out a well-built system: filter socks wrapped directly around the pipe as extra insurance against fines, splash pads or rock aprons at the outlet to prevent erosion, and, on sites with minimal slope to daylight to, a dry well as the discharge point instead of open air.
Sacred Garden Designs’ Approach to Drainage and Sustainability
Sacred Garden Designs has spent more than 25 years designing landscapes across Los Angeles that hold up structurally while using water wisely, work recognized with six HOUZZ Awards and a Sustainable Business Council nomination. Retaining wall drainage sits right at the intersection of those two goals: a wall that manages hydrostatic pressure correctly is also a wall that lets you plant drought-tolerant species right up against it without trapping moisture where it doesn’t belong.
The firm pairs drainage systems with water-wise plant selections and, where it fits the site, solar-powered irrigation, so the water that does need to reach your landscaping gets there efficiently instead of pooling behind block. [Author bio and case study placeholder.]
When Should You DIY vs Call a Professional?
Adding a few weep holes, clearing a clogged outlet, or trenching a short accessible section of an existing wall are reasonable DIY jobs for anyone comfortable with a rented trencher and a weekend. The physical work isn’t complicated; it’s mostly patience and getting the slope right.
Hiring a contractor makes sense once you’re installing continuous base pipe along an entire wall, excavating deep enough to need shoring, or tying an outlet into a municipal storm system, since that last one often requires permits and inspection anyway. A wall taller than about four feet, visible movement or cracking, a high water table, or an unexplained spring feeding the slope above your wall are the moments to call a geotechnical engineer instead of reaching for another bag of stone. The cost of that consultation is small next to the cost of rebuilding a wall that’s already failed.
— Denise
Get Professional Help With Retaining Wall Drainage and Design
Sacred Garden Designs handles retaining wall drainage the way it should be handled from day one, not patched in after a wall starts leaning. The firm’s design-build teams integrate stone, pipe, and outlet placement directly into the wall design, pair it with drought-tolerant plantings suited to your slope, and manage any permits needed for storm system connections.

If you’re staring at a bulging wall, planning a new one, or just want a second opinion before you start digging, a site visit gets you a clear answer fast. Schedule a consultation with Sacred Garden Designs to walk your property, review your drainage needs, and map out a plan that keeps your wall standing and your water use in check for years to come.
Where Can You Verify These Drainage Specs?
The installation specs and thresholds referenced throughout this guide come from a handful of sources worth bookmarking if you’re planning a build or retrofit yourself. Allan Block’s residential installation manual covers manufacturer-backed stone width and pipe placement standards. Build-Construct’s structural engineering guide breaks down weep hole versus pipe system decisions in more technical detail. Family Handyman’s retrofit guide walks through hands-on retrofit steps and the hose test. And BuildCalcHub’s technical guide lays out the four-part system framework referenced across this article. Cross-check any of these against your local building code before you finalize a design, since permit requirements for storm tie-ins vary by jurisdiction.