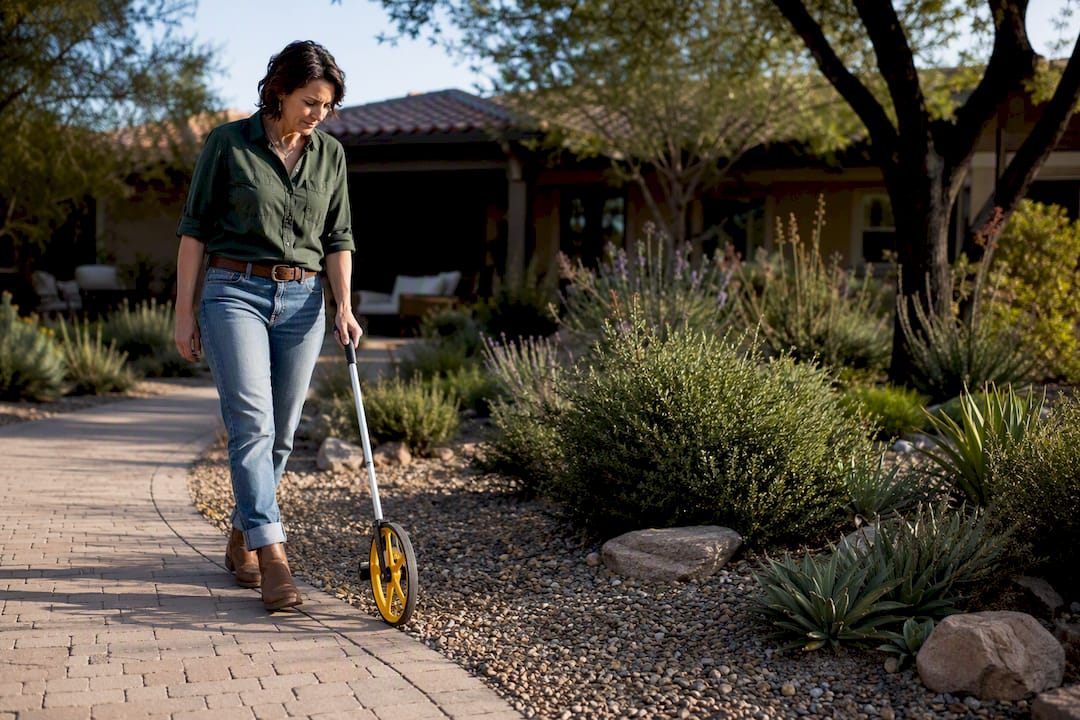
For most home vegetable gardens, a low-pressure drip system delivers the most consistent results with the least wasted water, as long as you add a filter and pressure regulator ahead of it. Soaker hoses work fine for small beds or short-term setups, and overhead sprinklers still have a place for seed germination. The real caveat is water quality: unfiltered or debris-heavy sources clog emitters fast, so the head assembly—including backflow preventer, filter, and pressure regulator—isn’t optional.
TL;DR:
- Using a filtered, pressure-regulated drip system maximizes water efficiency, with about 90 to 95 percent of water reaching the root zone.
- Drip irrigation applies water more precisely than sprinklers, reducing evaporation, wind drift, and disease risks, and saving roughly 30 to 50 cents per dollar spent on water.
- Vegetables generally need about one inch of water per week, split into multiple sessions, with adjustments during heat waves and cool periods.
- Proper system setup requires a backflow preventer, filter, pressure regulator, and timer, with tubing placement and emitter spacing tailored to soil type.
- Regular maintenance, soil moisture monitoring, and seasonal adjustments are essential for reliable performance and maximizing harvest quality.
Table of Contents
- What Are the Best Vegetable Garden Irrigation Methods?
- How Does Drip Irrigation Compare to Sprinklers for Water Savings?
- How Much Should You Water a Vegetable Garden Per Week?
- What Do You Need to Plan and Size an Irrigation System?
- How Do You Install Drip Lines in Raised Beds and Rows?
- How Do You Maintain and Troubleshoot a Drip System?
- How Do You Measure Soil Moisture to Time Watering Right?
- What Sustainability Practices Pair Well With Vegetable Garden Irrigation?
- How Does Watering Affect Vegetable Health and Yield?
- What Automation Options Work Best for Home Gardens?
- How Do You Adjust Irrigation for Seasons and Drought?
- A Water-Wise Perspective on Getting This Right
- Ready for a Professional Vegetable Garden Irrigation Design?
- Sources
What Are the Best Vegetable Garden Irrigation Methods?
Every irrigation method trades off cost, labor, and water efficiency differently, and the right one depends on your garden’s layout more than personal preference.
Drip and micro-irrigation deliver water through emitters directly at the root zone, either via drip tape (thin-walled tubing with built-in emitters, common in row crops) or rigid in-line tubing (better for raised beds you’ll reuse for years). Water barely touches the leaves, so it’s the go-to for tomatoes, peppers, squash, and anything prone to fungal issues.
Soaker hoses ooze water along their entire length through a porous rubber or recycled-fiber wall. They’re cheap, easy to snake through an existing bed, and reasonable for a small plot or a temporary season, but pressure drops off badly over long runs, so uniformity suffers past 25 or 30 feet.
Overhead sprinklers mimic rainfall and remain the practical choice for germinating seeds in a freshly prepared bed, where you need to wet the entire surface evenly before seedlings develop deep roots. Past that stage, they waste water to evaporation and wind drift, and wet foliage invites blight and powdery mildew.
Furrow irrigation, flooding shallow trenches between rows, still shows up in larger traditional row gardens with heavier clay soil that holds water well. It’s labor-intensive and imprecise for a backyard scale, but it needs no hardware at all.
- Drip/micro-irrigation: best for raised beds, established rows, disease-prone crops
- Soaker hose: best for small gardens, short runs, quick temporary setups
- Overhead sprinkler: best for seed-starting and germination, weakest for mature plants
- Furrow: best for large traditional rows in heavy soil, weakest for water efficiency
How Does Drip Irrigation Compare to Sprinklers for Water Savings?
The efficiency gap is not subtle. Drip irrigation applies water at high efficiency, while sprinklers and hand watering typically run at moderate efficiency.
By the numbers: Drip systems put 90 to 95 cents of every watering dollar directly into the root zone. Sprinklers lose 30 to 50 cents of it to evaporation, wind drift, and runoff before it ever reaches the plant.
That difference shows up in your water bill, but it also shows up in the garden itself. Keeping foliage dry cuts down on early blight, powdery mildew, and other splash-borne diseases that spread when overhead water hits leaves and sits there overnight.
Drip isn’t without headaches. Emitters are small, and small openings clog. Sediment, algae, mineral scale from hard water, even biofilm from a stagnant hose bib can choke a line before you notice a dry corner of the bed. The fix is mechanical, not mysterious: a mesh or disc filter ahead of the tubing, a flushing habit twice a season, and tubing routed under mulch rather than buried in soil, since buried lines hide leaks and clogs until a plant is already stressed.
Pro Tip: Run black poly tubing on top of the soil and cover it with two to three inches of mulch. You get the thermal protection of burial without losing the ability to spot a leak or a popped fitting during a five-second walk-through.
How Much Should You Water a Vegetable Garden Per Week?
The standard rule of thumb holds up across most climates and soil types: vegetables need about an inch of water per week, counting rainfall and irrigation combined. Since it takes roughly 0.62 gallons to apply 1 inch of water to a single square foot, a standard 4×8 raised bed (32 square feet) needs about 20 gallons a week.
- Calculate your bed’s square footage and multiply by 0.62 to get weekly gallons needed.
- Split that total into two or three watering sessions rather than one soaking, especially in sandy soil that drains fast.
- Check your emitter’s flow rate (commonly 0.5, 1, or 2 gallons per hour) and divide the weekly gallons by that rate to estimate total run-time minutes.
- Adjust the run time up during heat waves and down during cool, cloudy stretches or right after rain.
For a bed with 1-gallon-per-hour emitters spaced to deliver the full 20 gallons, that’s roughly 20 emitter-hours of total run time per week, split across sessions.
- Water early morning, ideally before 6 a.m., since morning watering lets foliage dry during the day and cuts disease risk
- Increase frequency, not necessarily volume, during heat above 90°F
- Reduce watering as fruiting crops mature; excess water late in the season can dilute flavor in tomatoes and melons
- Watch wind: skip sprinkler cycles on gusty days, since drift wastes water fast
What Do You Need to Plan and Size an Irrigation System?
A drip system fails less often from bad tubing and more often from skipped hardware at the tap. The order matters: backflow preventer, then filter, then pressure regulator, then timer. Skip a step, and you either contaminate your household water supply or blow emitters off the line the first time pressure spikes.
- Backflow preventer stops garden water (and any fertilizer or soil in the line) from siphoning back into your drinking water
- Filter (120 to 200 mesh for most home use) catches sediment before it reaches emitters
- Pressure regulator drops household pressure, often 40 to 80 psi, down to the 15 to 30 psi that drip tubing and emitters are built for
- Timer or controller automates start times and run duration so you’re not standing at the spigot
Utah State Extension notes that missing any of these three components is a common cause of early system failure, usually showing up as blown-out tubing or emitters that spray instead of drip.
For zone capacity, add up the gallons-per-hour rating of every emitter on a line and keep it under your spigot’s realistic output, generally 200 to 300 GPH for a standard residential hose bib. Keep half-inch mainline runs conservative, under a few hundred feet per zone, so pressure doesn’t collapse at the far end of the row. If your household pressure runs below 40 psi, a small booster pump helps; above 80 psi, the regulator is not optional.
Pro Tip: Never mix sprinklers and drip emitters on the same valve. They need different pressures and flow rates, and running them together means one or the other gets starved.
How Do You Install Drip Lines in Raised Beds and Rows?
Layout is where a lot of first-time drip setups go wrong, and the fix is usually just spacing and pattern, not new equipment.
Emitter spacing depends on your soil: water spreads narrow and deep in sandy soil, so emitters closer together, around 8 to 10 inches, keep root zones from drying between drip points. Loam handles the standard 12-inch spacing well. Clay spreads water sideways more, so you can stretch spacing to 18 inches without leaving dry gaps.
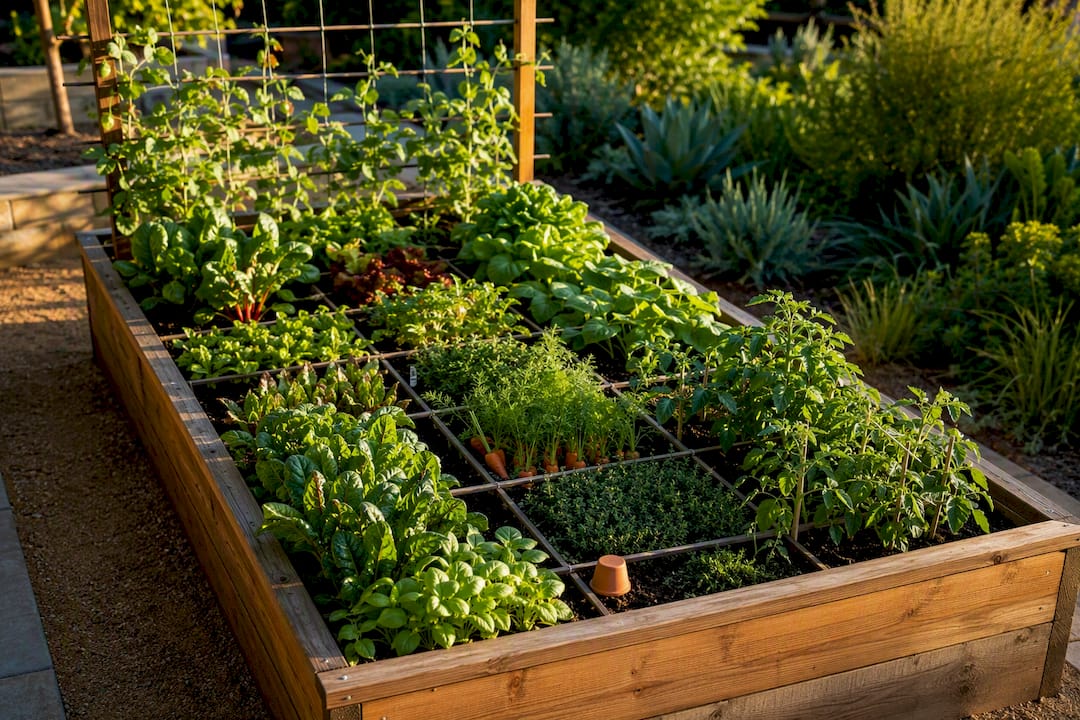
For a typical 4×8 raised bed, three to four parallel drip lines spaced about 12 to 18 inches apart cover the bed evenly without overlap waste. Long traditional rows do better with several shorter zones rather than one long run, since shorter runs hold pressure and flow more evenly end to end.
- Use drip tape for annual rows you’ll till and replant each season, since it’s cheap and easy to pull up. Use rigid in-line tubing for raised beds you’ll reuse year after year. Cap unused punch holes with goof plugs as your planting layout changes. Cover lines with mulch, never soil, to protect tubing and still allow visual leak checks.
How Do You Maintain and Troubleshoot a Drip System?
Routine upkeep is short and mostly preventive. Rinse the filter monthly and flush the lines twice a season, once at midseason and once before you shut the system down for winter. Flushing just means opening the end caps and letting water run until it comes out clear, which clears sediment before it settles into emitters.
- Check plant signs first: a wilting patch despite a normal watering schedule usually means a clogged or disconnected emitter nearby.
- Walk the lines while the system runs and look for dry spots, weak trickles, or unexpected sprays.
- Replace individual clogged emitters rather than the whole line; they pop out and snap in within seconds.
- Check the pressure regulator if multiple emitters across the bed are underperforming at once, since a failed regulator affects the whole zone.
- Before the first hard freeze, disconnect and drain the system, and store above-ground components indoors to prevent cracked fittings.
Pro Tip: Keep a handful of spare emitters and a few feet of extra tubing in a garage bin. A five-minute fix during the growing season beats a week of an underwatered corner.
How Do You Measure Soil Moisture to Time Watering Right?
Guessing by looking at the surface is the most common mistake gardeners make, since topsoil dries out long before the root zone does. A simple finger test, pushing a finger 2 to 3 inches into the soil, tells you more than a glance ever will: if it’s dry at that depth, it’s time to water.
For more consistency, a basic soil moisture meter (the probe-and-dial type sold at most garden centers) gives a quick numeric reading without digging. Push it into the root zone near, not directly on top of, a drip emitter for an accurate reading. More consistent still, a simple tensiometer measures soil tension and works well for gardeners tracking multiple beds with different soil types.
The trowel test remains the low-tech gold standard: dig down 4 to 6 inches near the root zone and squeeze a handful of soil. It should hold together loosely, like a wrung-out sponge. If it crumbles apart, water. If it drips or forms mud, hold off.
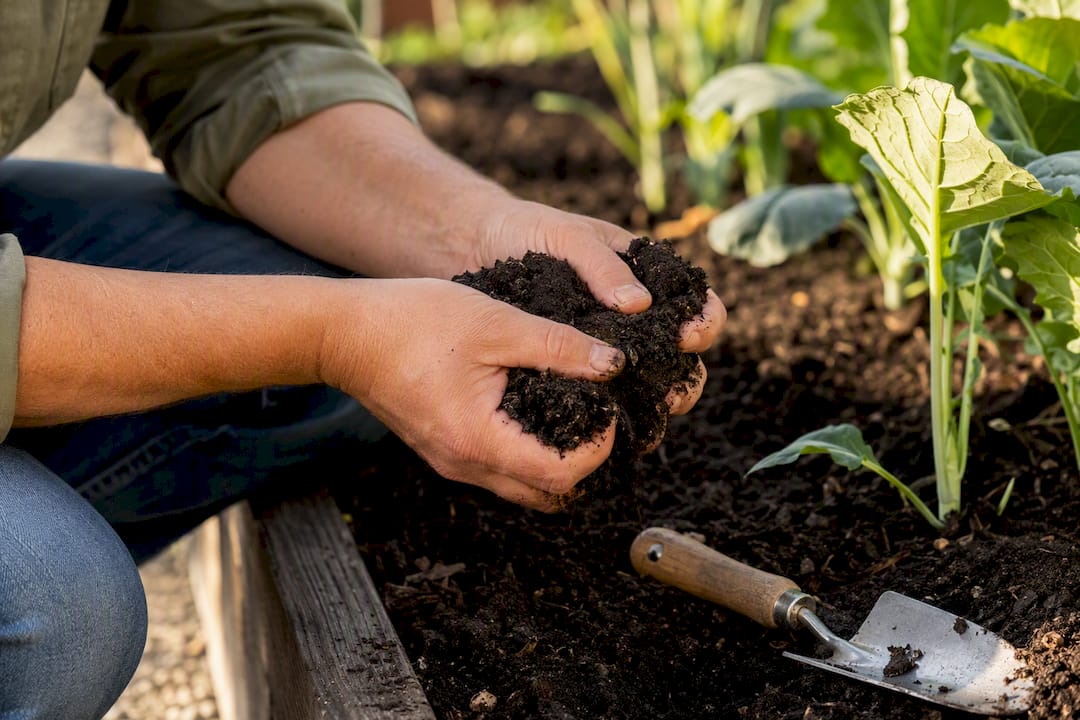
Timing your soil checks matters as much as the method. Check soil moisture before your scheduled watering day rather than after, so you can skip or shorten a cycle when a recent rain already did the job. Pairing this with a rain sensor on an automated timer prevents the common failure mode of a system that waters on schedule regardless of whether the sky just delivered an inch overnight.
What Sustainability Practices Pair Well With Vegetable Garden Irrigation?
Efficient irrigation and water conservation aren’t separate projects. They’re the same project viewed from two angles.
Mulch is the single cheapest conservation tool available. A two to three inch layer of straw, wood chips, or shredded leaves cuts evaporation from the soil surface dramatically and keeps root zones cooler during heat waves, which reduces how often you need to run the system at all.
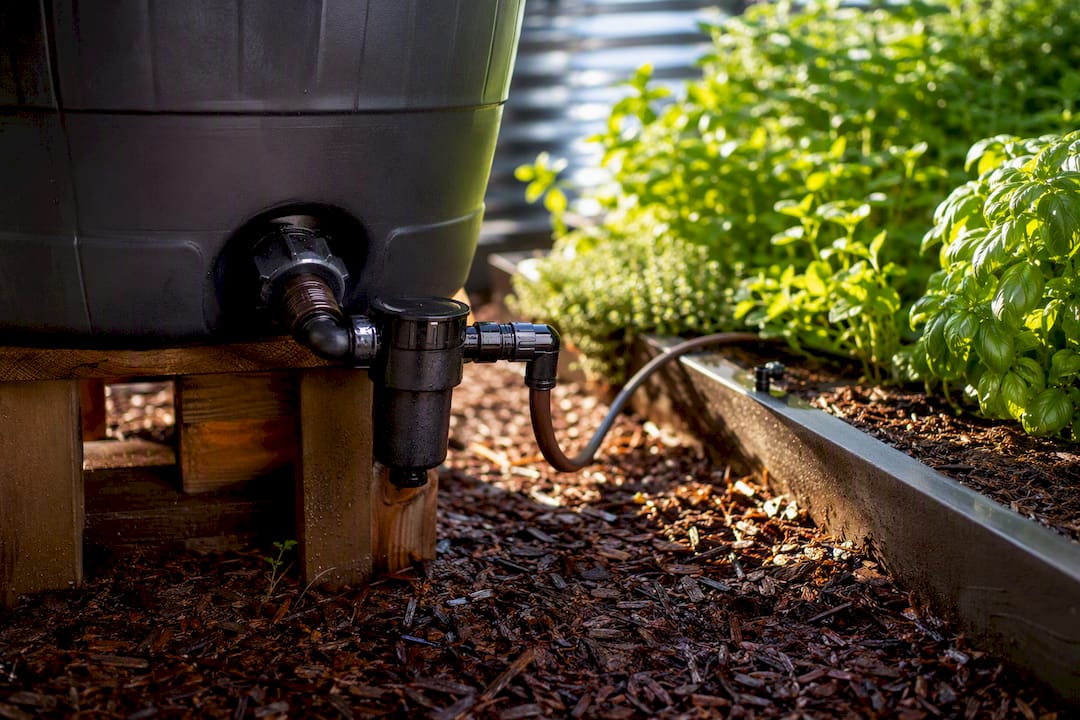
Rainwater harvesting integrates naturally with drip. A rain barrel positioned to feed a low-pressure drip zone through gravity works for small beds, though it needs its own filtration since barrel water carries roof debris and organic matter that will clog emitters faster than tap water. Larger cisterns paired with a small pump can feed a full garden zone and take real pressure off municipal water use during dry stretches.
Grouping plants by water need, a practice sometimes called hydrozoning, means you’re not running an entire zone at full volume just to satisfy the thirstiest crop in the bed. Tomatoes and squash tolerate different watering rhythms than lettuce and herbs; separating them into their own drip zones lets you match volume to actual need instead of averaging it out.
Choosing drought-tolerant vegetable varieties, and timing plantings to avoid the peak of summer heat where possible, reduces total water demand before irrigation even enters the picture.
How Does Watering Affect Vegetable Health and Yield?
Inconsistent watering shows up in the harvest before it shows up anywhere else. Tomatoes split when a dry spell is followed by a heavy soak, since the fruit’s interior swells faster than the skin can stretch. Blossom-end rot in tomatoes and peppers traces back to uneven soil moisture interfering with calcium uptake, not a calcium deficiency in the soil itself.
Root vegetables like carrots and beets need steady, even moisture to size up properly; a bed that dries out and rebounds repeatedly produces stunted or misshapen roots. Leafy greens go bitter and bolt early under water stress, cutting your harvest window short just as the plants were hitting their stride.
Overwatering carries its own yield penalty. Waterlogged roots suffocate, inviting root rot and reducing the plant’s ability to take up nutrients, and excess late-season water dilutes flavor concentration in fruiting crops like melons and tomatoes right when you want sugars at their peak.
Consistent drip delivery, tuned to the 1-inch-per-week baseline and adjusted by soil checks, keeps that swing narrow. That consistency, more than any single watering technique, is what separates a heavy, well-formed harvest from a stressed and uneven one.
What Automation Options Work Best for Home Gardens?
A basic hose-end timer is the entry point, and it solves the single biggest reliability problem in home irrigation: forgetting to water, or forgetting to turn it off. Set it once and it runs on schedule whether you’re home or not.
Smart controllers step it up by connecting to local weather data or a soil moisture sensor, automatically skipping a cycle after rain or extending run time during a heat wave. For a vegetable garden, the practical value isn’t novelty. It’s the rain-skip function, since that single feature prevents the overwatering that damages fruiting crops during a wet week.
Multi-zone controllers let you run a drip zone for tomatoes on a different schedule than a zone for shallow-rooted greens, which matters more in a vegetable garden than in an ornamental landscape because vegetable water needs vary so widely by crop and growth stage.
Solar-powered irrigation timers and controllers solve a real installation headache: gardens far from an outlet. A solar-powered kit paired with a battery backup keeps a timer running without trenching for electrical, particularly useful for a raised bed setup tucked at the back of a property.
Whatever controller you choose, pair it with a rain sensor or soil moisture input if your budget allows it. A timer that waters on a fixed schedule regardless of conditions defeats a good chunk of the water savings drip irrigation is supposed to deliver.
How Do You Adjust Irrigation for Seasons and Drought?
Watering needs shift through the growing season, and a system set once in May and ignored through September is leaving both water and yield on the table.
Spring seedlings need frequent, shallow watering since their root systems haven’t reached depth yet; this is one of the few stages where overhead sprinkling still earns its keep, since it wets the whole surface evenly. As roots establish through early summer, shift to deeper, less frequent drip cycles that encourage roots to grow down rather than staying shallow and dependent on daily watering.
Peak summer heat calls for the heaviest adjustment: shorter, more frequent drip cycles rather than one long soak, since hot, dry soil can only absorb water at a limited rate before runoff starts. Fall brings the reverse: as temperatures drop and days shorten, cut back volume and frequency to match slowing plant growth.
During declared drought conditions or local water restrictions, drip already has the built-in advantage of efficiency, but you can tighten further: prioritize fruiting crops over leafy greens if you must ration, extend the interval between waterings while checking soil moisture more often to catch stress early, and lean harder on mulch to slow evaporation. A garden on drip with good mulch coverage typically weathers a watering-restriction period far better than one running overhead sprinklers, simply because so much less water is lost before it ever reaches a root.
A Water-Wise Perspective on Getting This Right
Most irrigation advice online treats drip setup like a shopping list: buy tubing, buy emitters, connect, done. That’s how systems end up failing within a season. The unglamorous parts, the filter, the pressure regulator, the flushing schedule, are what separate a system that runs for a decade from one that’s abandoned in a garage by August.
The company has extensive experience building water-wise landscapes across drought-prone terrain, with work recognized in the industry and featured on notable platforms. That kind of repeated, hands-on exposure to real installations, not just theory, is what tells you which corners actually matter and which ones don’t. A small raised bed with municipal water and decent pressure is a legitimate weekend DIY project. A whole-yard system tied into rainwater harvesting, uneven terrain, or a well with variable pressure is a different animal, and that’s when bringing in a professional saves you from redoing the work twice.
— Denise Buchanan
Ready for a Professional Vegetable Garden Irrigation Design?
If you’ve read this far and you’re weighing whether to build the system yourself or hand it off, here’s the honest breakdown: a simple raised bed on municipal water is a solid DIY weekend. A full yard retrofit, a well with inconsistent pressure, or a setup that integrates rainwater harvesting is where a design-build team earns its cost by getting the zoning, pressure math, and layout right the first time.
The company builds sustainable, water-wise irrigation systems for vegetable gardens and full landscapes, offering services from simple drip retrofits to design-build installations with rainwater integration. If low water pressure is part of what’s holding your project back, it’s worth diagnosing the cause before you size a system around it. Browse past irrigation and water-wise landscape projects for a sense of what’s possible on a property like yours, then schedule a consultation to get a system designed around your actual soil, pressure, and crops instead of a generic kit.